Automation in FL Studio
Javi Lloret
In other daws such as Logic or ProTools, you'll see automation lanes attached to the track you want to automate. Just like this:

However, in FL Studio, things work a bit differently.
Just like with Patterns (MIDI Regions) and Samples (Audio Clips), Automation lanes can be placed anywhere in the Playlist (timeline), and can have any duration or shape that you wish. FL Studio will give you the freedom to do anything you want with an automation lane: copying, cutting, pasting, create an LFO from it, transfer it's parameters into a different automation lane, among many other features.
- How do we create an automation lane?
On all faders, knobs, and dials you see in FL Studio you’ll be able to create automation by right-clicking the control you’d like to automate and selecting ‘Create Automation Clip’
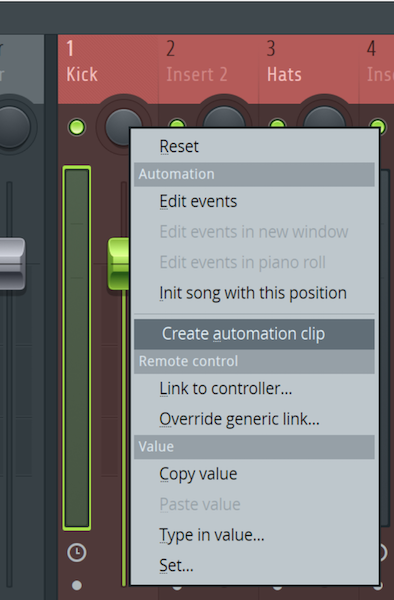
This will work for all native controls, not third-party plugins.
- What if I would like to automate third-party plugin parameters?
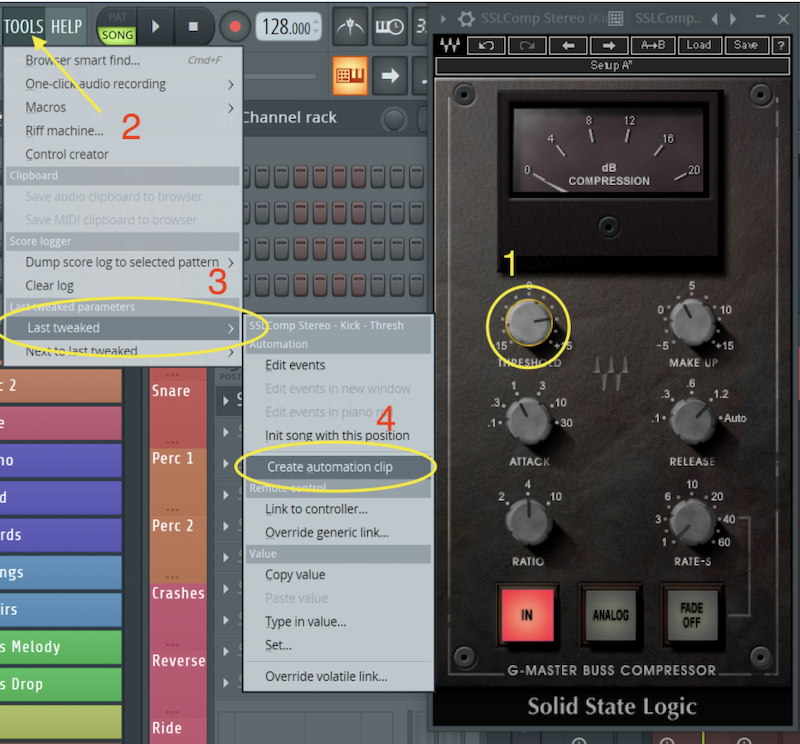
There are several ways, but the easiest and fastest is following these easy steps:
1) Touch the knob you’d like to automate
Go to tools -
2) Last Tweaked parameters -
3) last tweaked -
4) Create automation clip
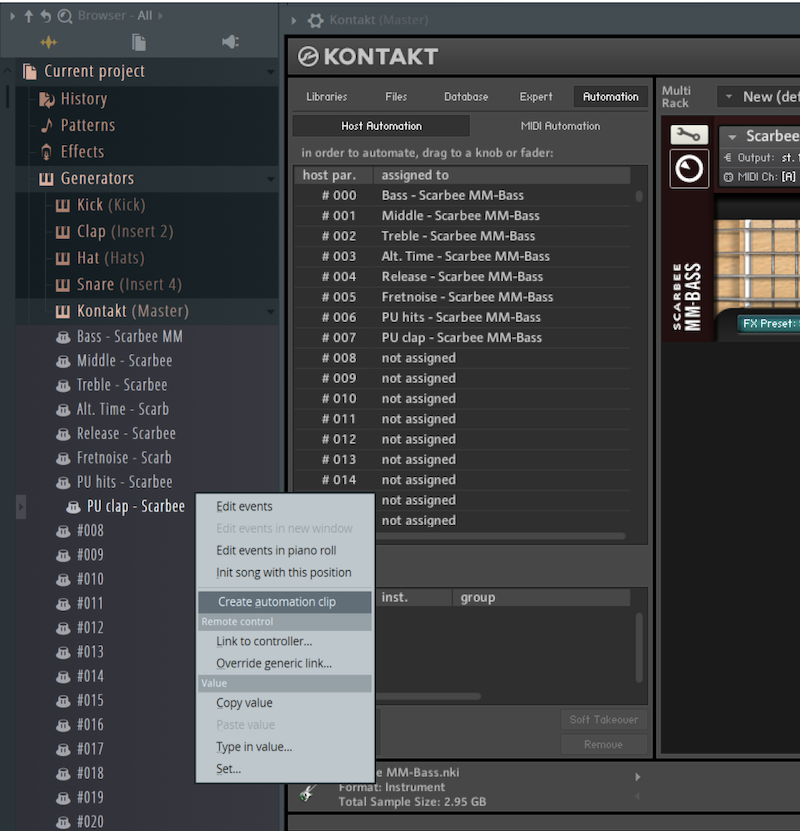
- What if that still doesn’t work?
Some third-party plugins such as Kontakt give a bit of a fight some times to create automation.
When that happens, you’ll have to access the Browser on your left, look for the plugin which parameter you want to automate (in the case of Kontakt, that will be classified as a ‘Generator’), and select the specific CC control you are looking for. Right-click on it, and the ‘Create Automation Clip’ will show up.
Once you have your automation lane layed out, you can do tons of stuff with it. Just like with Samples (Audio Clips) or Patterns (Midi Regions) you can use the tools in the playlist to edit these, such as the grab tool, scissors tool, zoom tool, brush tool, among many others available. But with automations we have some additional controls to shape up the lanes:
There's three things you can shape up manually:
1) Control Points - which you can move in any direction
2) Automation Mode - by right-clicking on a control point, you can decide the shape of the curve between two control points.
3) Tension Handles - which will determine what happens with that shape you chose between 2 control points

source: image-line.com
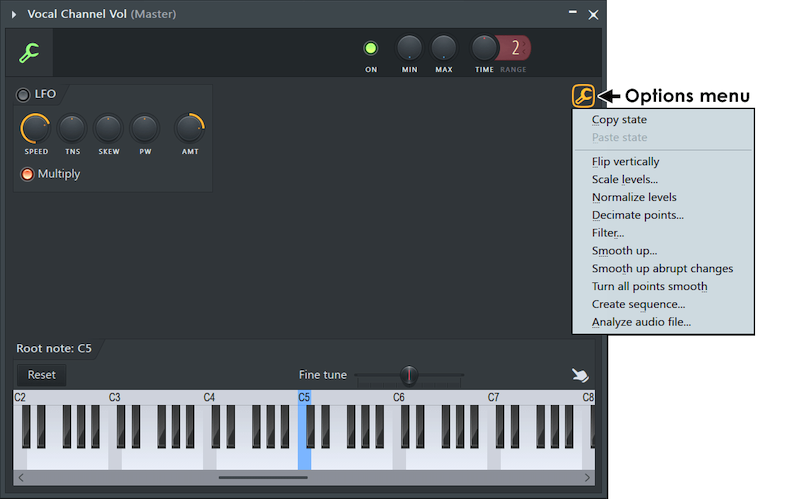
At the same time you can change color, size, icon, routing and all the rest of features by accessing the clip menu on the top left corner of the automation lane. As I mentioned earlier, FL Studio treats automation lanes in the same manner as audio clips or patterns when it comes to the clip menu.
Finally, there's the Automation Clip Channel Settings which will let you copy and paste the automation parameters into other automation clips, flip vertically the automation that you've set up, normalize automation levels, among many other options!
source: image-line.com
Also, you'll realize there's an LFO Switch button in there! And that's because FL Studio will allow you to create an LFO-shaped automation lane which looks something like this:
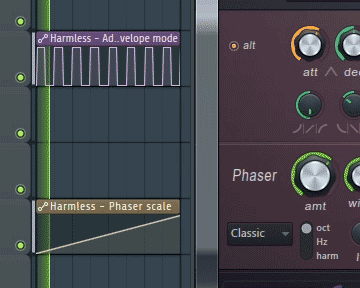
source: Supergnaw at Imgur.com
As you can see, on the purple automation on top now we're controlling the 'Alt' knob on this Plugin named 'Harmless' by using the LFO Feature on the Automation lane, saving time rather than drawing in lots of Control Points and setting up the curve shapes.
That's all for today on Automations in FL Studio, now it's up to you to experiment with these and come up with some cool evolving sounds for your piece.
Have fun :)
Sign-up for a Peer Training today if you’d like to learn more about these and other topics at library.berklee.edu/training