ProTools Setup for Video Scoring
by Javi Lloret
SESSION SETUP - DASHBOARD
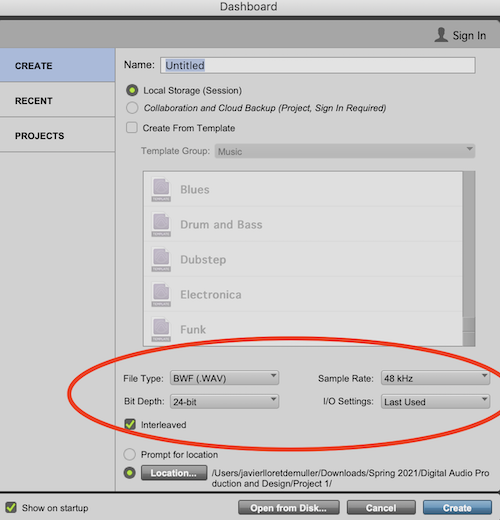
When you open Pro Tools the Dashboard will show up, and while most people might skip this step, it’s crucial to check the settings you are choosing for the current session, especially when working with video.
The first thing we have to watch out for is the Sample Rate. For video scoring, most of the time you’ll be working at 48kHz (maybe at 96kHz if the client specifies so, or if the video requires such a sample rate). - if you don’t know what Sample Rate means, or how to know the sample rate of a video, check out the Sample Rate article for more information -
Once we’ve chosen the sample rate, we will choose 24-bit Bit Depth and a high-resolution File Type such as .WAV. Don’t forget to name your project and check the ‘Interleaved’ checkbox!
FRAME RATES
Now that we’ve set up the session, we have to make sure that Pro Tools is set up at the same frame rate as the video we’re going to be working with. To do so, we’re going to open the movie with Quicktime and open the Inspector (press Cmd + I)
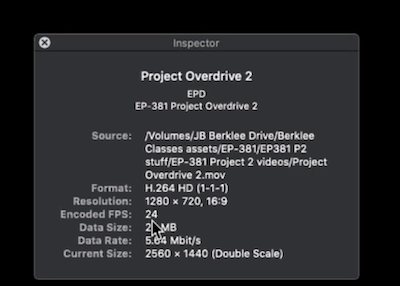
As we can see, the Inspector will tell us the ‘Encoded FPS (Frames per Second)’, which is the frame rate of the video. There are several types of frame rates for different mediums and countries, to learn more about it check out the frame rates article.
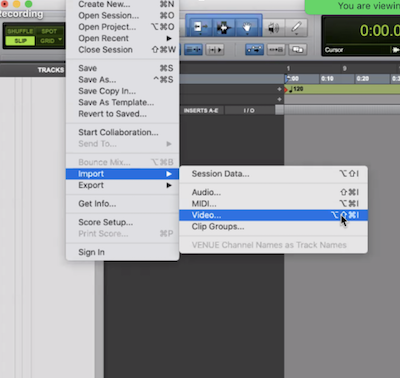
To set up our frame rate we’re going to import the video:
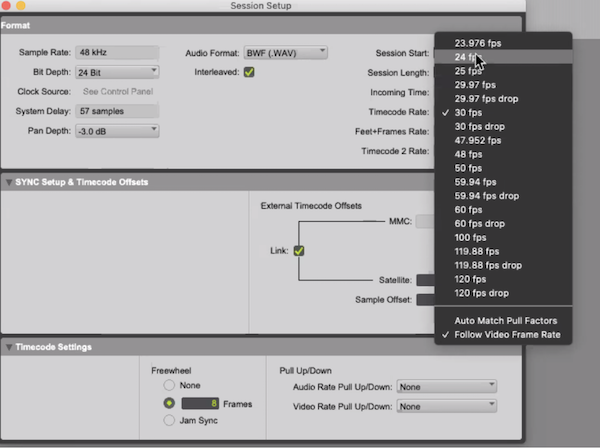
Once we’ve imported it, then we access the ‘Session Setup’ window by clicking the ‘Setup’ button on the menu bar on top of the screen.
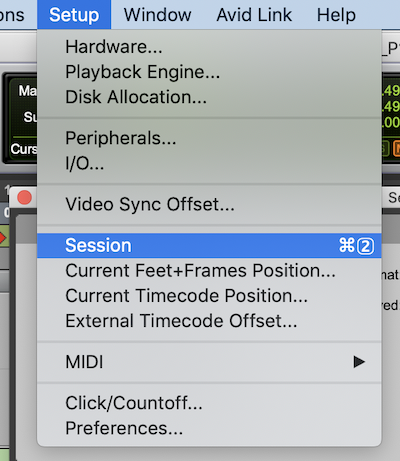
Once in the ‘Session setup’ window, select the FPS rate of your movie at the ‘Timecode Rate’ option. In my case, since the inspector indicated that my movie is at 24fps, I will select 24fps.
TIMECODE
Now that we’ve set up the sample rate, bit depth, and FPS, we can adjust our display at the top so we can see the time code of our movie while we compose the piece. To do so, just click on the green display on top and select ‘TimeCode’
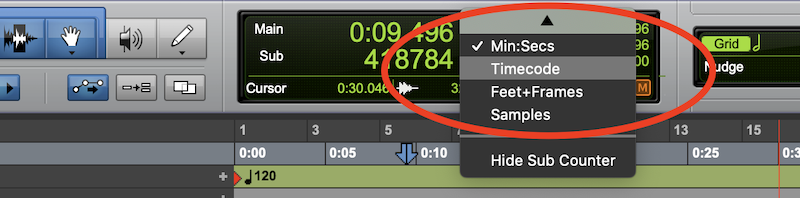
This display will show us H:MM:SS:FR (Hours: Minutes: Seconds: Frames)
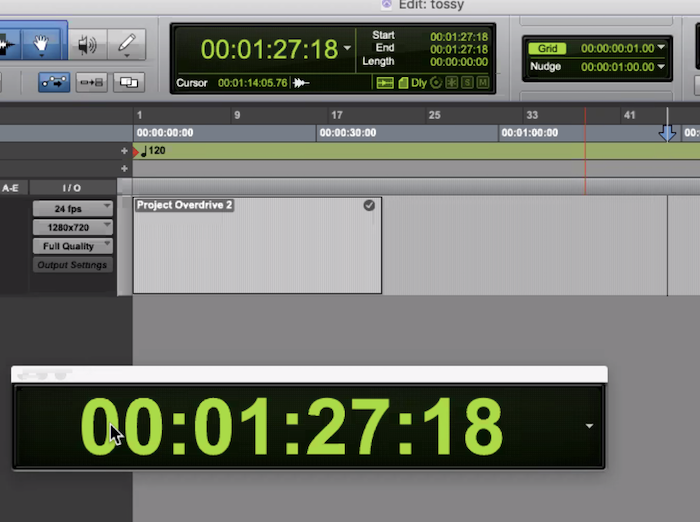
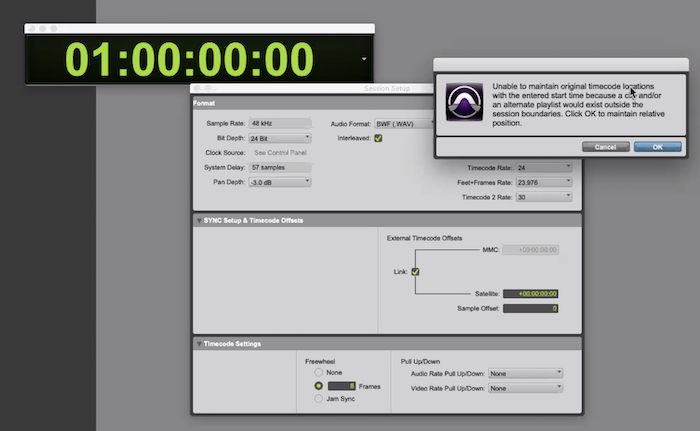
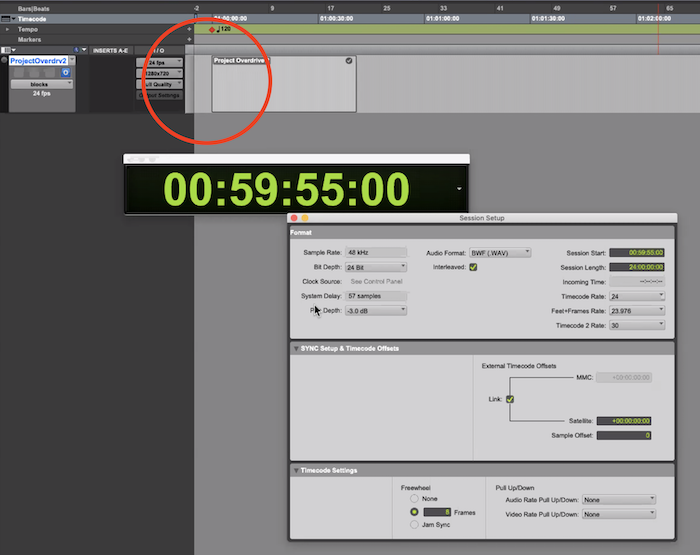
Then, to give ourselves the possibility of putting in sounds before the clip starts, we have to set up the Session Start at 1h, since various software doesn’t understand negative numbers in video. For this reason, we’re not gonna have the Session start at 00:00:00:00 (also known as midnight).
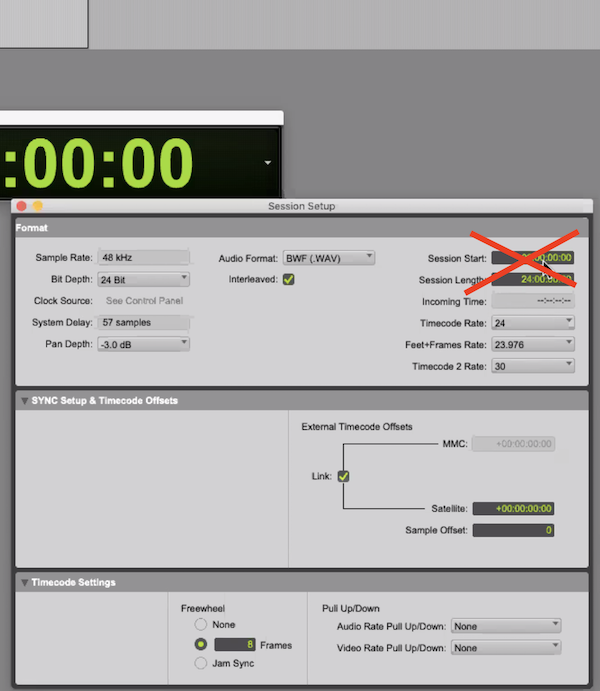
Instead, we change it to 01:00:00:00 or 00:59:XX:XX on the ‘Session Setup’ window.
This way, we get the following space before the start of the clip.
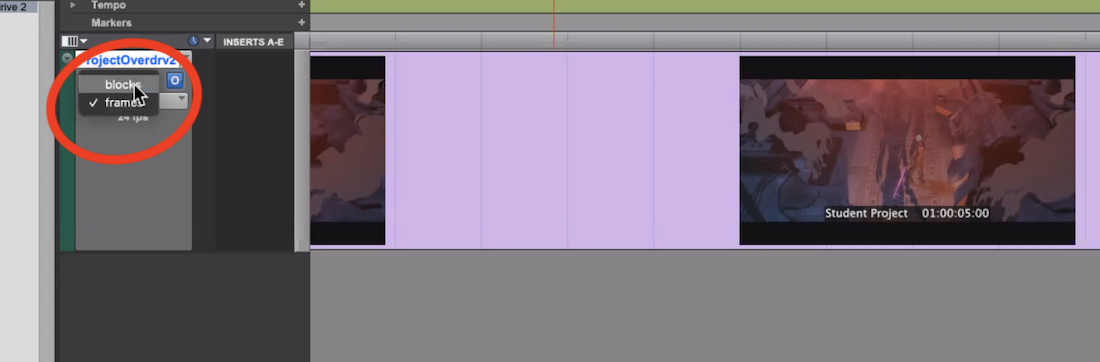
*If Pro Tools has a bit of a strain with the preview of the frames (also called "picons" *picture icons*) you can switch the view of the movie, from frames to blocks like this:
You're all set now! Have fun making the music :)
Sign-up for a Peer Training today if you’d like to learn more about these and other topics at library.berklee.edu/training