Sends, Busses, and Aux Tracks in Logic Pro X
SCROLL DOWN FOR A VIDEO VERSION OF THIS POST!!!!
The concept of sends and busses, in general, is one that beginner DAW users often struggle to understand. It took me quite a while to feel confident enough in my understanding of the concept to adopt it, but after I started, I never looked back!
Sends provide a powerful way to manage effects, save CPU, and create a cohesive mix. Let’s dive into sends, busses, and aux tracks as they present themselves in Logic Pro X! We’ve got three important terms to cover before we begin. These words are “send,” “bus,” and “aux track (short for auxiliary track).”
Let’s start with the idea of “sends.” This term is the broadest of the two and refers to “sending” an amount of an effect to a specific track. The term does not refer to a tangible aspect of Logic, rather, it is used to refer to the idea or action of using busses and aux tracks to apply effects!
Next, we have “busses.” Busses are perhaps the most abstract idea of the three terms because we can’t see them. I like to refer to busses as the “middle man” of the send. When we send an effect or an audio signal to a bus in Logic, it is only halfway routed. From here, we need to tell it where to go. That’s where aux tracks come in.
You have probably asked for your friend to “pass the aux” at least once in your life. The aux cable we all know so well from those days before Bluetooth can be compared to the bus and the aux track. Just as the aux cable takes the audio signal from a phone or iPod and brings it to the “aux input” of a speaker or car console, a “bus” transfers signal from a track to an “aux track,” or vice versa. Think of the bus as the aux cable, and the aux track as the aux input on a speaker.
So why would we need to use these features?
Sends, busses, and aux tracks work together to allow Logic users to route audio and effects around their project. This means that it is possible to send an effect, such as reverb, to multiple tracks at once. By doing this, we can save the computer’s power because we are only running one plugin on an aux track, rather than having separate plugins on each track. It also means that we can create a more cohesive mix by affecting multiple tracks with the exact same plugin settings.
Aux tracks and busses also allow us to create what we call “sub-mixes.” This involves sending audio signals from many audio or instrument tracks to one aux track and routing the output of that track to the master to create a mini-master for that group of instruments. This is a great mixing technique to help glue parts of a project together and, once again, make the track more cohesive.
Example 1: Sending Effects
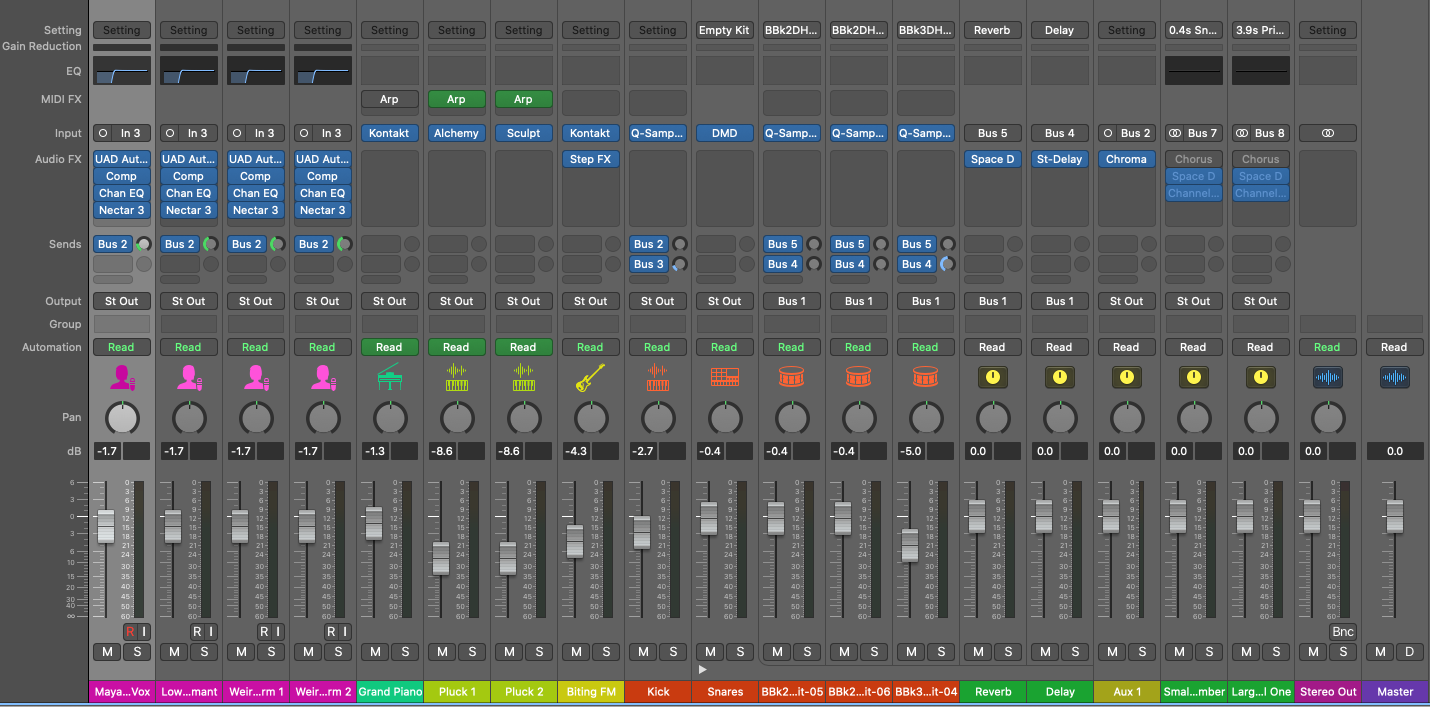
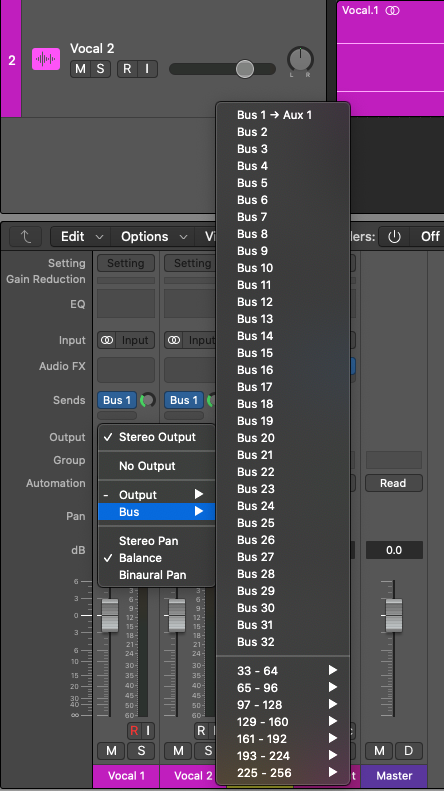
Let’s apply this concept to Logic’s interface. Let’s say we had two vocal tracks that we want to affect with the same reverb plugin. As you can see in the mixer below, I have two audio tracks, “Vocal 1” and “Vocal 2.”

The first thing I am going to do is send a bus to these two tracks. I decided to select bus 1 as a send on both tracks. I can do this by selecting the dropdown under “sends”
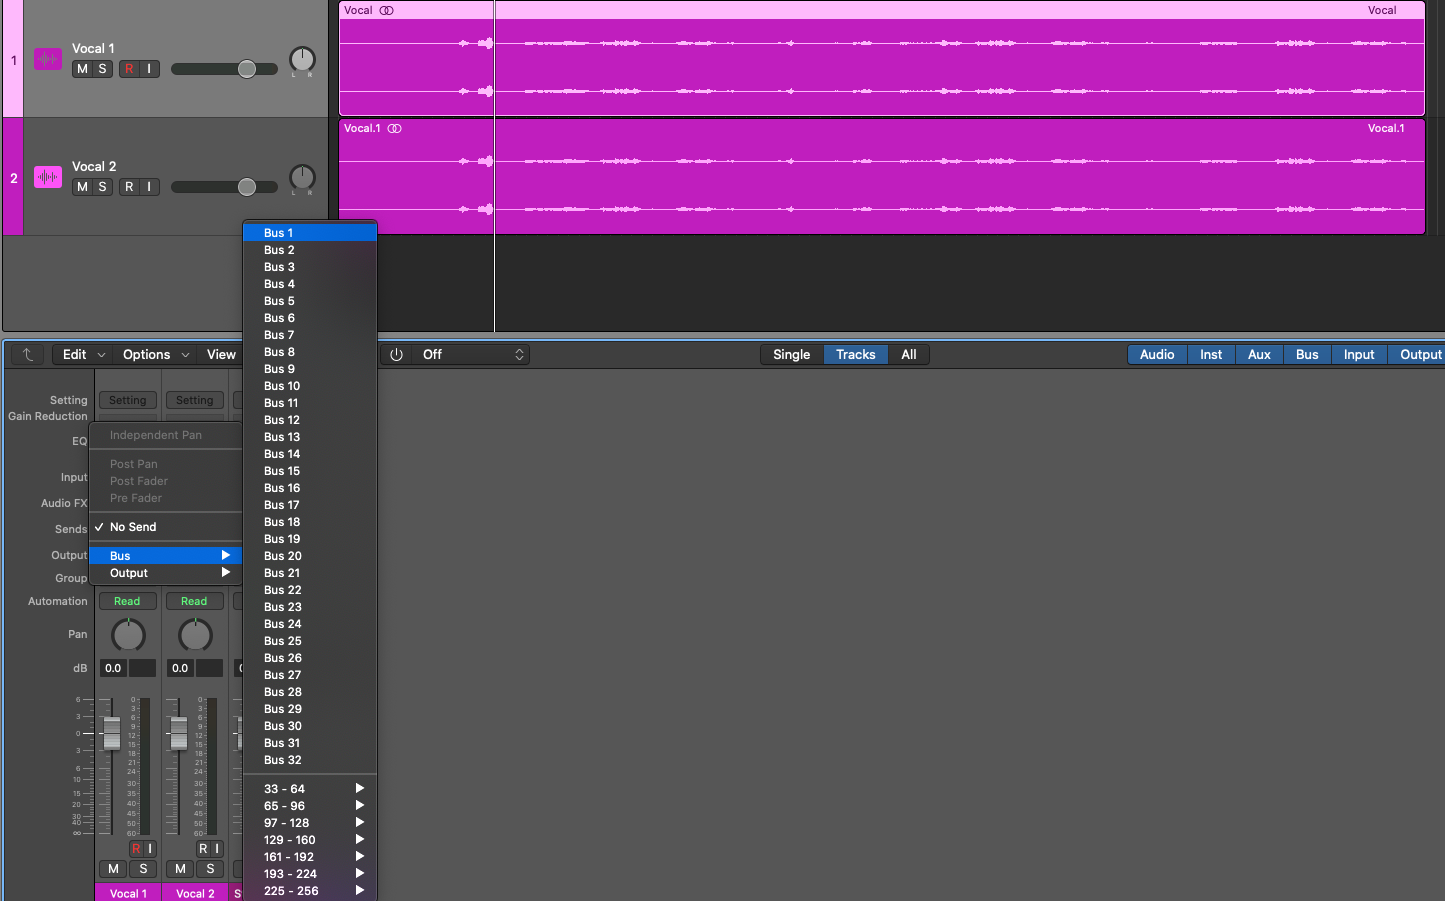
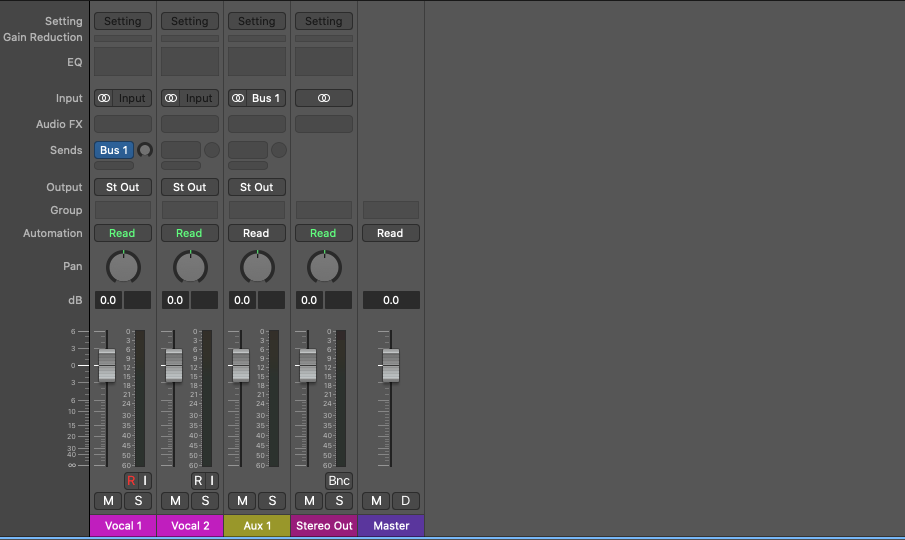
Once I do this, Logic will automatically create an aux track that corresponds to the bus I selected on those two tracks. The aux track is called "aux 1" and is yellow in the second image above.
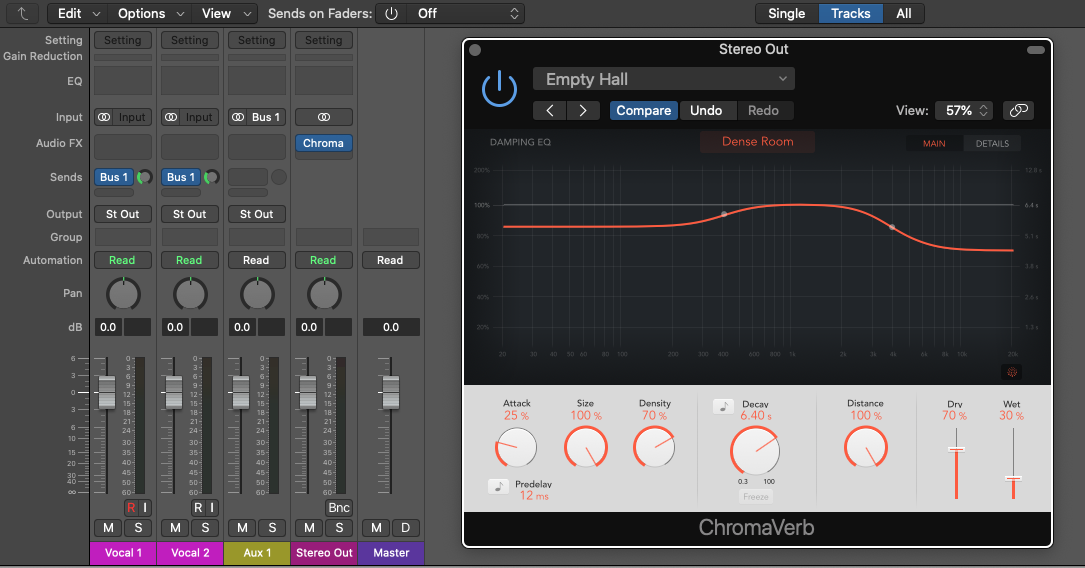
As you can see, the input of the aux track is set to bus 1 and the output is set to the stereo out. From here, I am going to add a reverb plugin to the aux track and set the dry/wet to 100%.
Now, using the knob next to the name of the send on the vocal tracks, I can select the amount of reverb that I send to these two tracks. I will then be able to hear the reverb effect on the vocals, but I will see the reverb metered on the aux track rather than as part of the output of the vocals!

Since the reverb is living on its own track now, I can affect it using compression or a gate, or anything I want! It gives me more control over my reverb sound and allows me to have one reverb affecting multiple tracks at once!
Example 2: Submixes
Now, let’s talk about another use for aux tracks and busses. Say I want to create a sub-mix of these two vocals. This means that I will create one track that both vocal tracks are routed to so that I can apply effects and plugins to the group of vocals and affect them as one unit.
What I can do is set the main output of both vocal tracks as a bus rather than as their default stereo out.
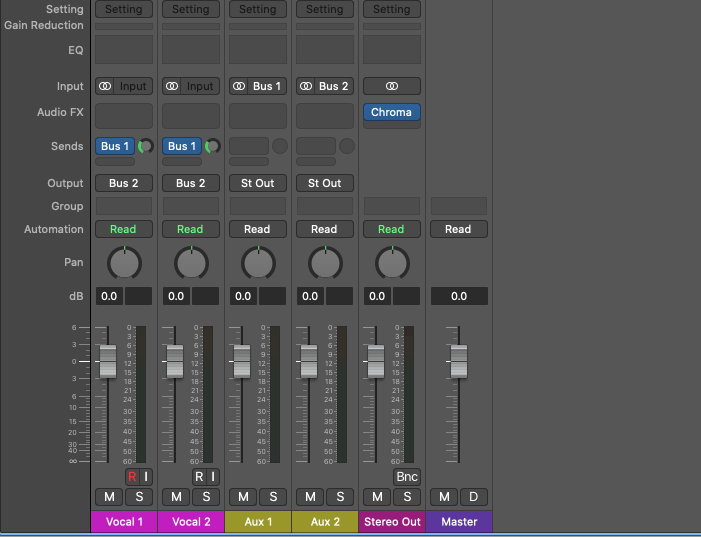
From here, I can route the bus as the input of an aux track by making sure that the input of an aux track is set to the bus I sent my vocals to. In Logic, if you send anything to an empty bus, a new aux track is automatically created. In this case, Logic created a new bus for me called "aux 2" since I was using "aux 1" as my reverb send track.
I want to compress both of these vocal tracks tas one unit using a single compressor to “glue them together” and make them feel like one cohesive unit.
Since my aux track has bus 2 as its input and both of my vocal tracks have bus 2 as their outputs, anything I do to aux 2 is going to affect the vocals as a unit.
I am going to place a compressor onto the aux track and adjust it as I want to!
This is a super common way to mix tracks and create cohesive groups of tracks to create a more glued-together sound.