Automation in Ableton Live
Automation provides a way to control changes in parameters over time in an arrangement. In Ableton Live, automation can be accessed by pressing the letter "A" on the keyboard when in arrangement view. There are tons of techniques that can be used to write and record automation, so let’s jump in and explore them!
Selecting Your Parameter
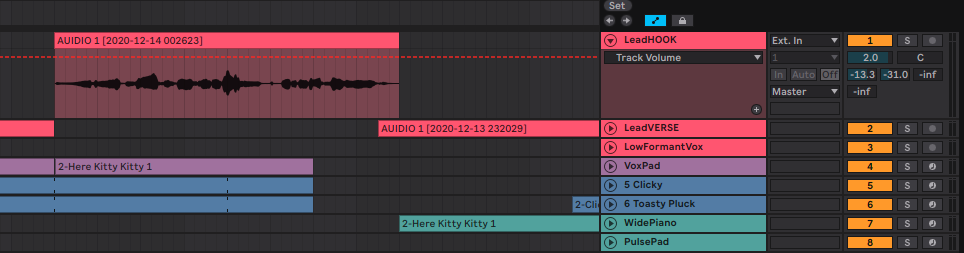
Ableton users can use automation to control volume, panning, send levels, and many plugin parameters, whether they be native or third-party!
On the track header in automation mode, there are two dropdown menus available. The first dropdown selects the category/plugin which you want to control, and the second selects the specific parameter. Below, I have selected the Mixer as my category, and then selected Volume as my parameter within the Mixer category.
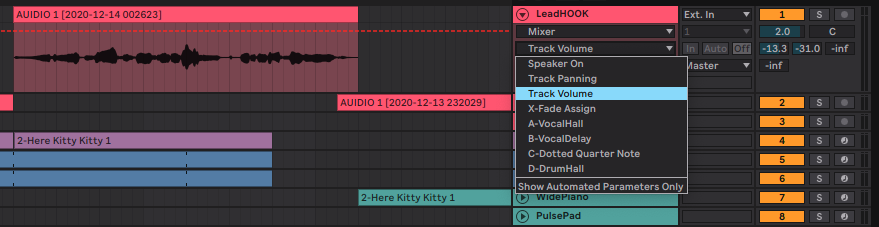
Here, I have selected a third-party plugin I own called Nectar, and you can see that there are a limited number of parameters I can automate for this plugin.
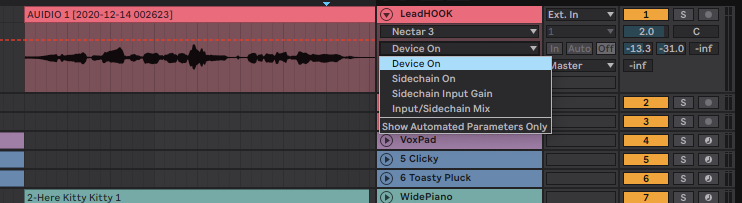
Different plugins have different parameters available for automation, so check out which ones your plugins have listed here.
Writing Automation
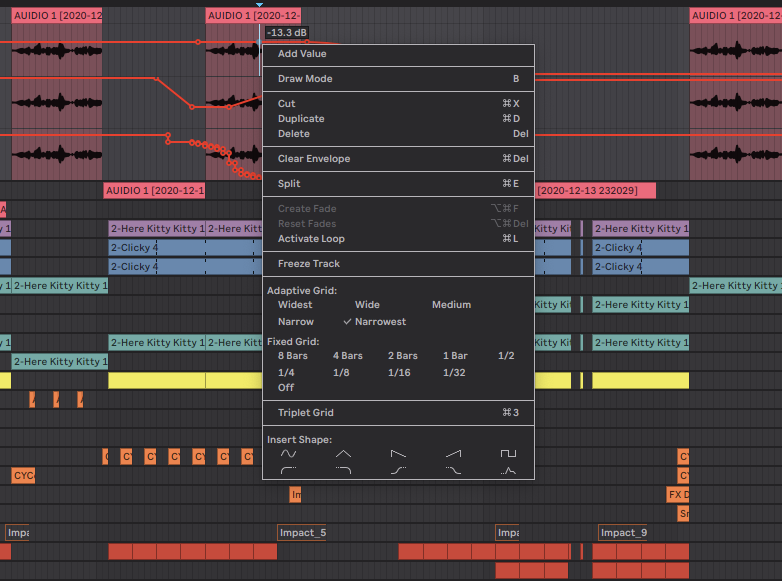
It is easy to create clean and effective automation envelopes using your mouse. Simply click anywhere on the automation line to create automation points on the track. Then, move automation dots to create angles and slopes in your automation!

Pencil Tool
You can also use the pencil tool to draw in automation shapes more freely.
Curves and Waveforms
Right-click on the automation lane to add preset waveshapes to your automation lane
Recording real-time automation
MIDI Map a parameter to a knob, button, or fader on your controller, press record, and control the parameter from your controller. This will record into your automation lane!
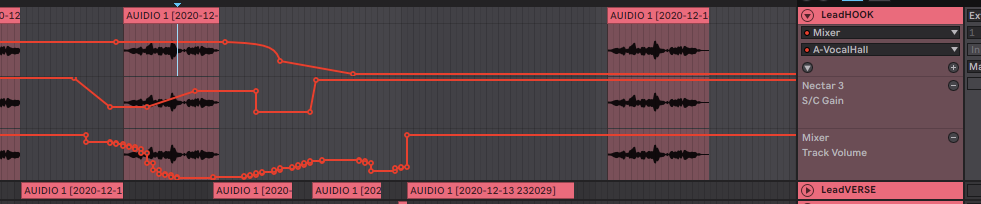
Adding and Viewing Automation Lanes
As you can see below, it is possible to view and edit multiple automation lanes at a time for one track. This means that you can make batch edits to multiple parameters and have the automation match. For example, I might want my frequency cutoff and volume to be controlled in the exact same way. All I need to do is press the little plus sign on the track header, add another automation lane, and select both tracks before manipulating my automation data. This can also be useful just for viewing automation and keeping track of what parameters have automation data stored within a given track.