Logic's Step Sequencer: Everything You Need to Know
Back in May 2020 when Logic 10.5 was first released, I was absolutely in love. Honestly, I don't think the honeymoon phase is ending anytime soon...
Before the release of the all-powerful Logic version 10.5, I always found that drum programming in Logic was super annoying compared to other DAWs. There isn't anything wrong with using the piano roll to create drum patterns, but for me, the lack of an easy sampler device in Logic combined with the way the piano roll visualized drums was just not my forte.

Then, with the release of Logic's new Quick Sampler and the introduction of the Step Sequencer, I felt much more comfortable making my drum patterns in Logic. The Step Sequencer is one AMAZING device for manipulating MIDI data in a patterned way. Let's check it out!
Getting Started
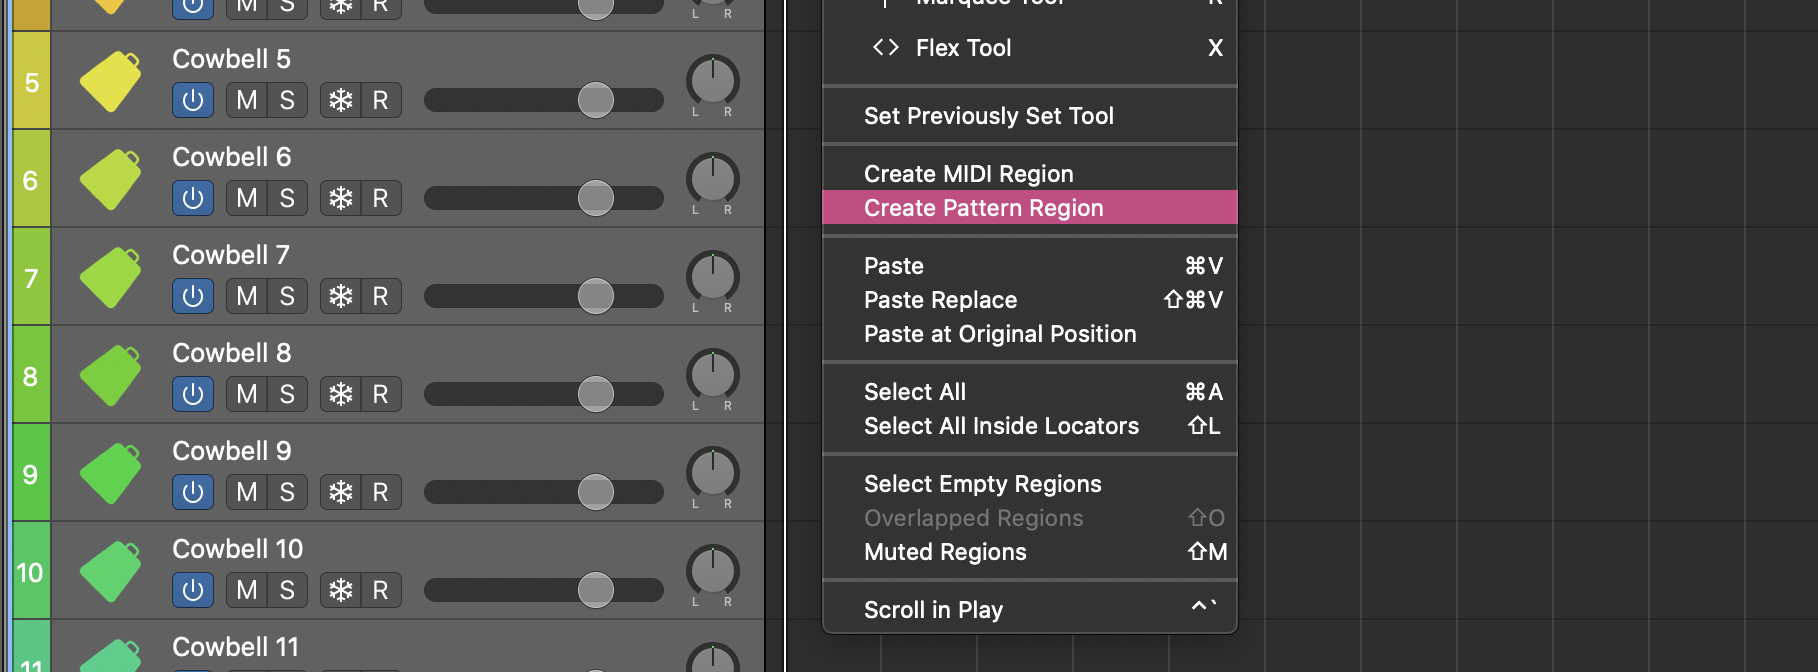
To open the Sequencer, simply CTRL + Click (or right-click) an empty space in an instrument track and select create pattern region.
Upon opening the Step Sequencer, you will see that it is modeled off of classic analog sequencers and drum machines. Yet, this sequencer has a TON more automation options and versatility than your classic Korg or Arturia.
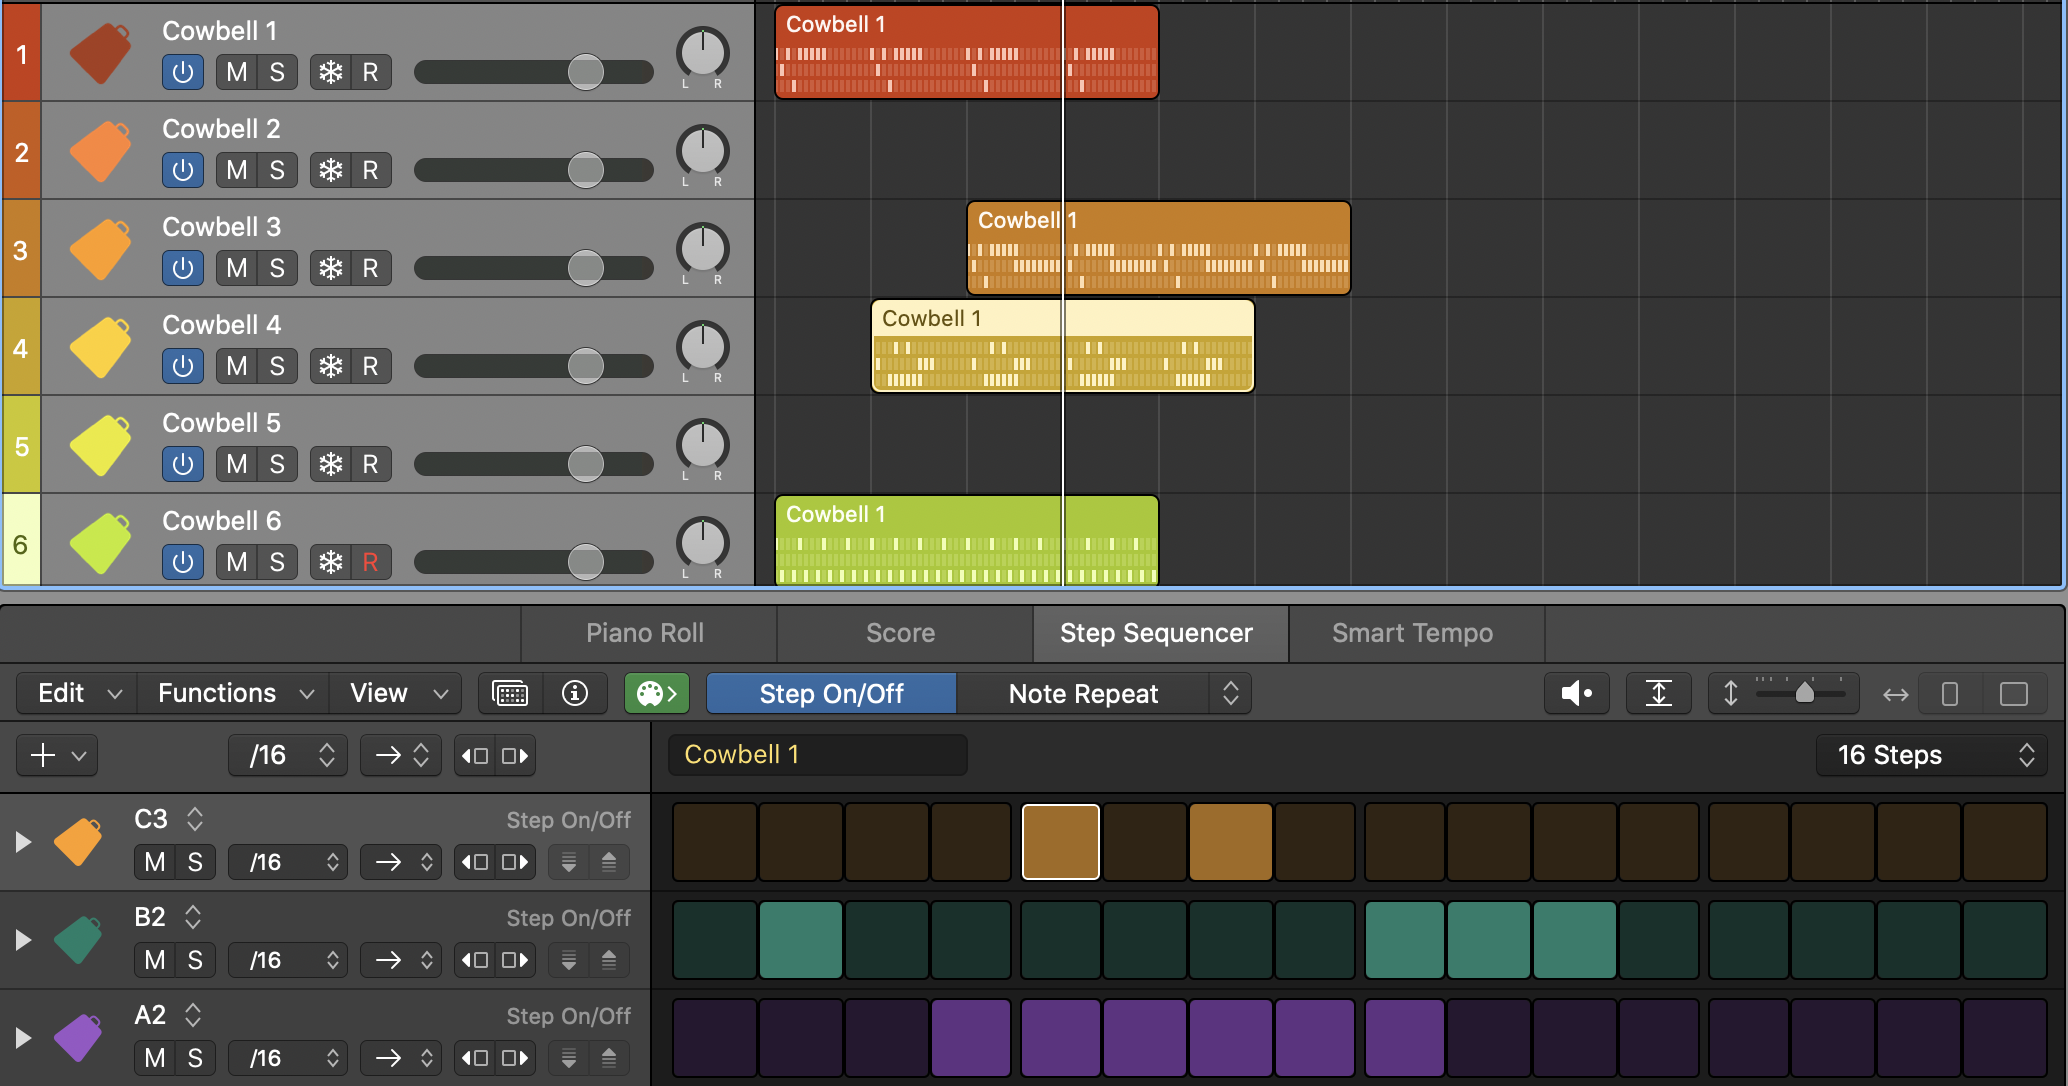
If you selected a drum patch or drum machine, you will see the drum hits lined up on the left just like they would be in your arrangement above. If you choose to insert a pattern region on a pitched instrument, you will see note names on the left.
Then, throw a pattern in that bad boy by simply clicking on any of the empty steps.
Pattern Settings and Customization
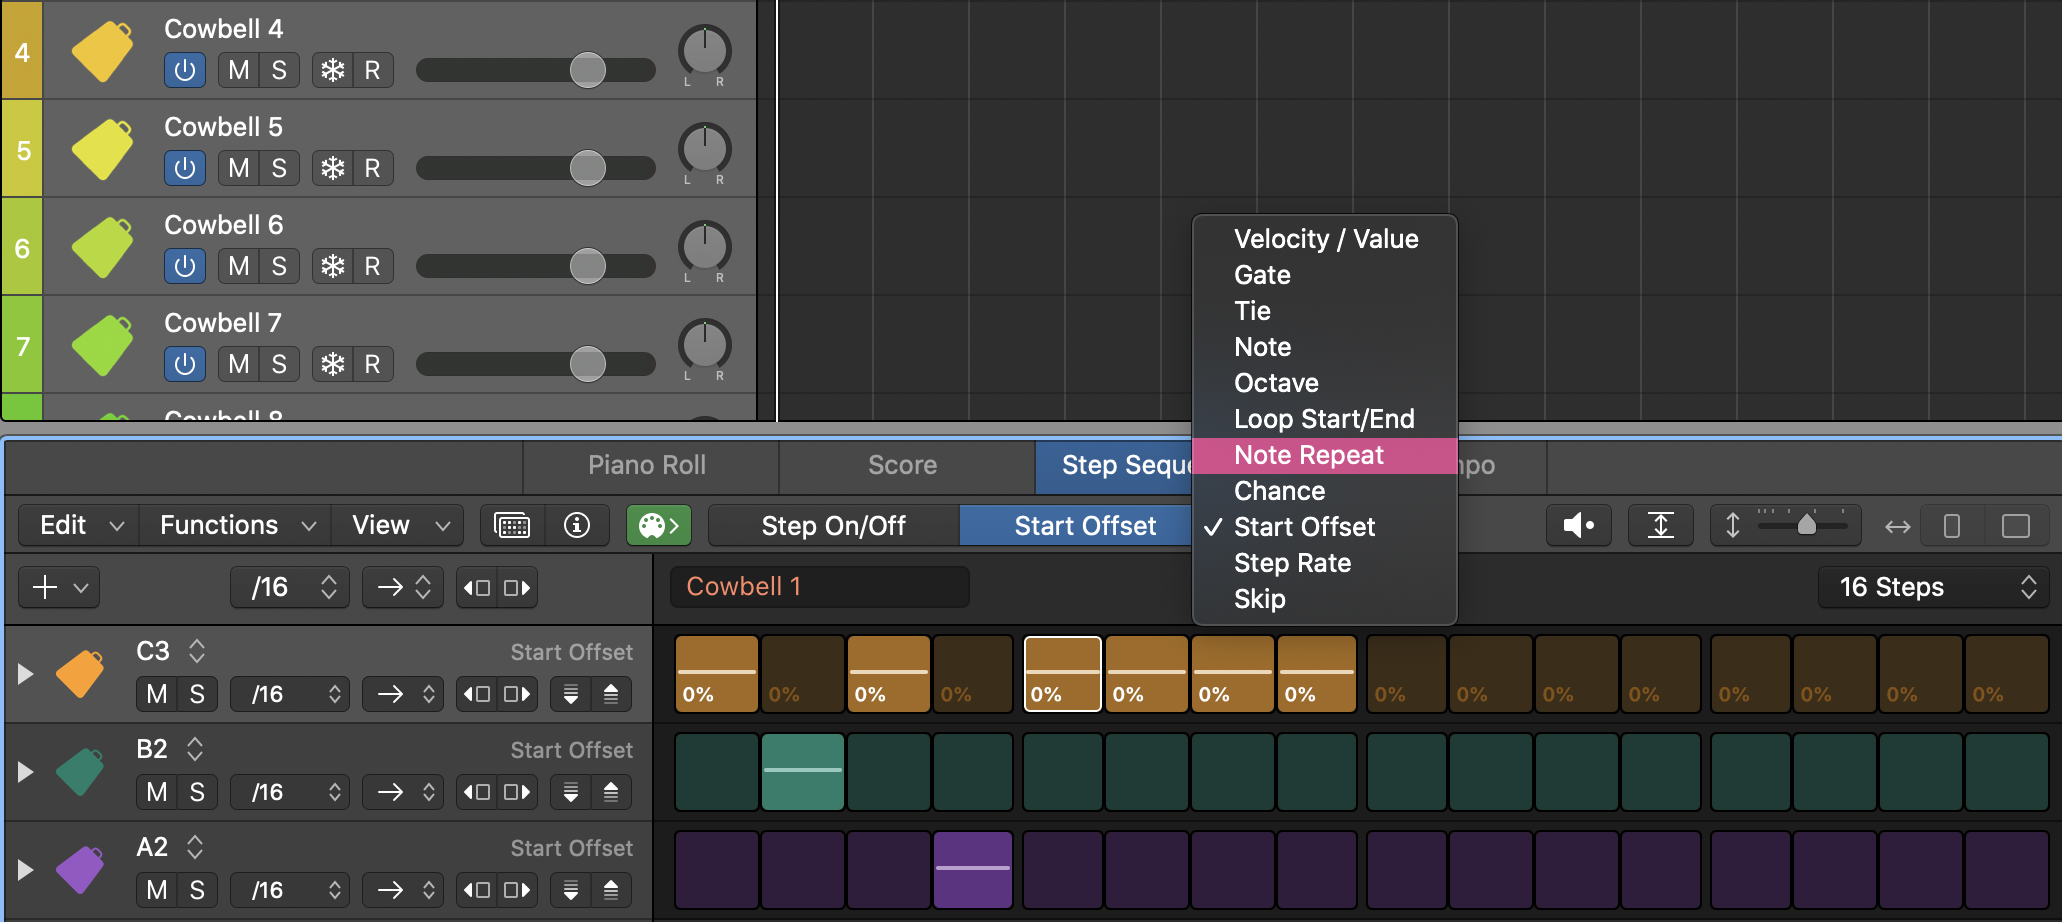
As you can see in the image below, you can select from a variety of different parameters to edit. For example, you can change the octave of each individual step, or change the velocity value.
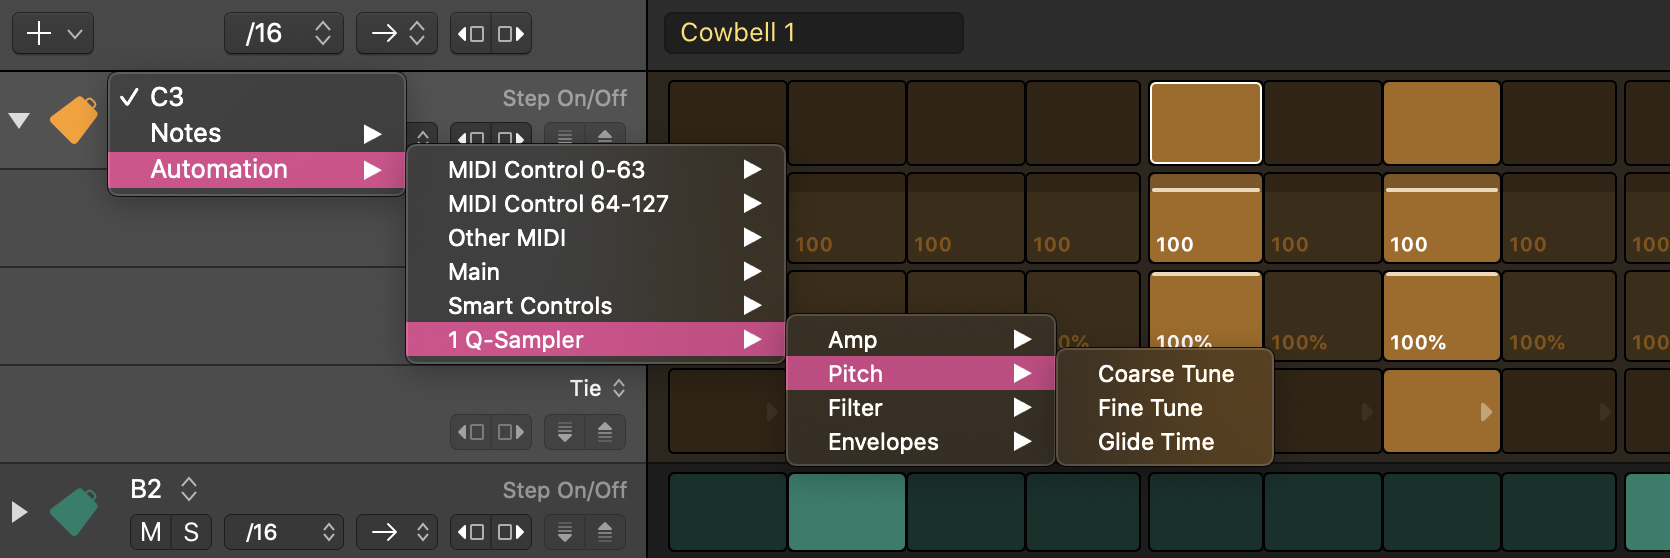
You can also access these parameters using "automation view" by opening up the dropdown menu on the far left of the row headers, as shown below.

Using this automation dropdown allows you to see all automated parameters at once for a better visual understanding of the sound you will hear. You can select which parameters you are editing in this view by using the dropdowns in the track header under automation:
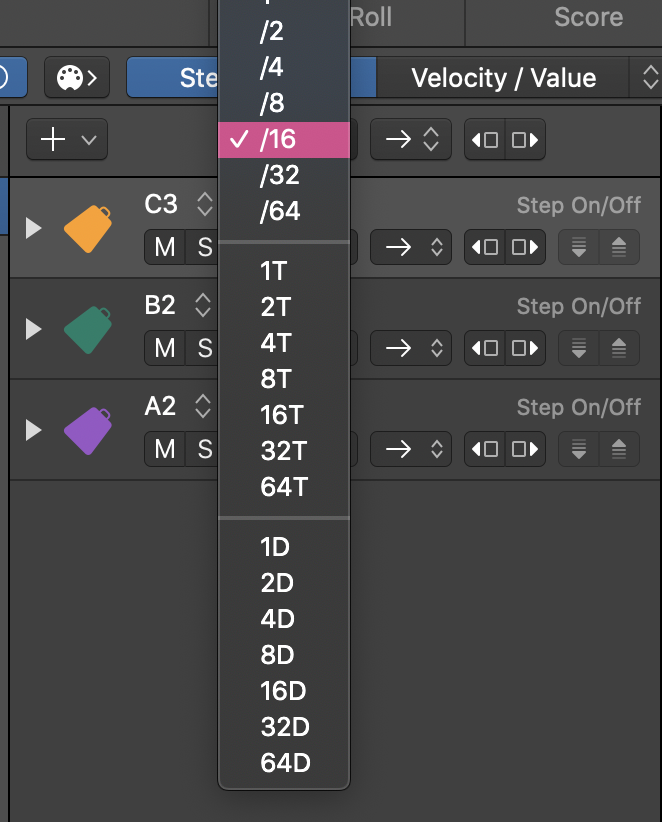
Change the number of steps you have by using the dropdown menu in the upper right corner of the sequencer. Change the subdivision value of each step using the dropdown above the row headers:

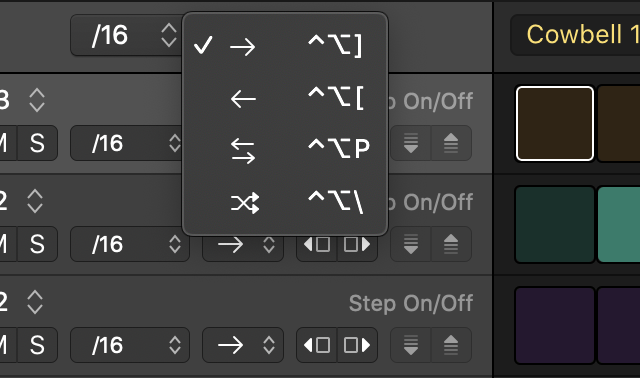
Set whether the region plays forwards, backward, bounces back and forth, or is shuffled from the dropdown next to the step subdivision dropdown:
Each pattern region, row, and individual step has its own Inspector, where you can adjust all kinds of super detailed parameters to make your pattern exactly the way you envision it:

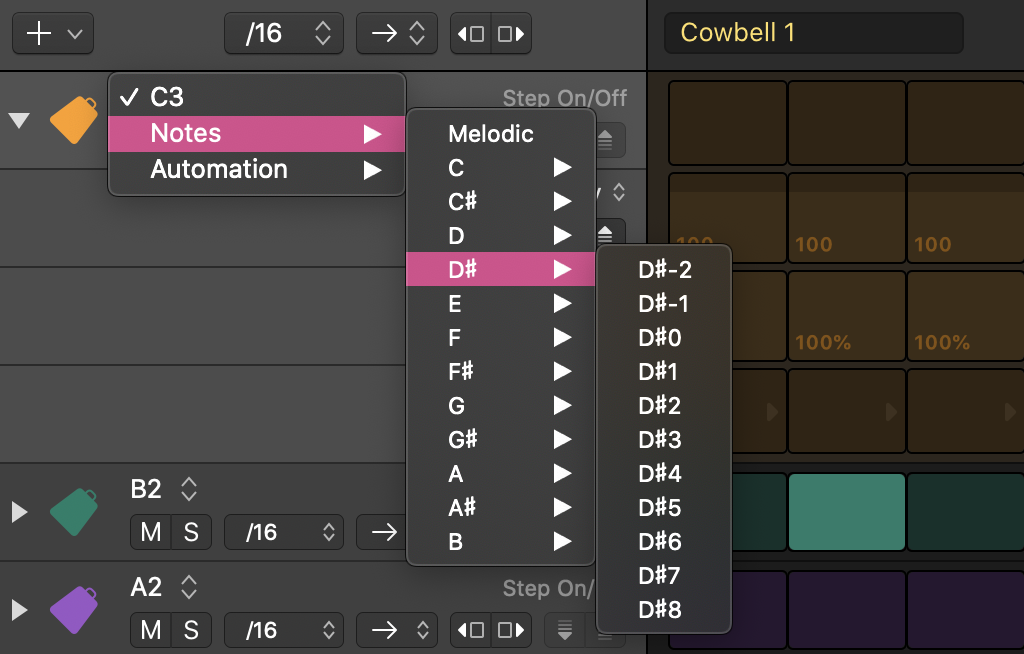
You can easily change note numbers or samples on the track header:
Saving and Storing Sequence Patterns
The Step Sequencer allows you to save sequence patterns to be used in later projects or instances. This function can be accessed using the pattern browser. An easy key command to access it is CMD + B (when the Sequencer is open). (Save Pattern: SHFT + CMD + P)

There is so much you can do with the Step Sequencer, and it is super helpful for creating arpeggios, melodic patterns, and drum sequences! However, I think the best thing about it is that it provides a great new way to get inspiration when you feel that creative block coming on...