MIDI Mapping in Logic Pro X
Written by Maya and Javi
MIDI Mapping is a great way to control parameters and effects in reat-time. Once set up, it allows for more accurate and creative automation recording as well as tons more options for MIDI performance aspects!

Opening Controller Assignments
Open the Controller Assignments window by either:
Using key command SHIFT + ALT + K
Choosing Logic Pro X → Control Surfaces → Controller Assignments
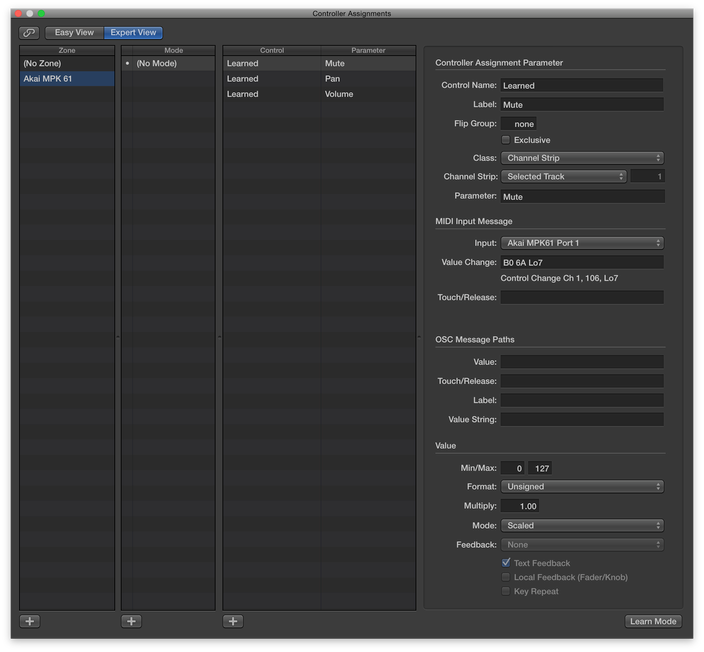
Easy and Expert Views
Expert View allows for a bit more control, allowing users to control the MIDI CC values available, and more.
Easy View gives users a bit less to look at while still providing mapping abilities for a quicker mapping experience.
*If you can’t see Expert View, it is probably because you don’t have Advanced Tools enabled in your Logic Preferences.
Organization
You can organize your assignments by clicking the “+” on the bottom of the window to create new assignment “zones” and keep everything organized into little folders!
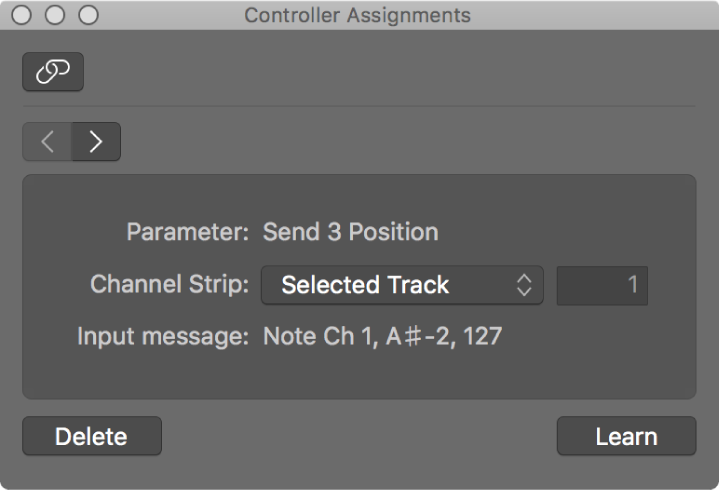
Learn Mode
- Enable learn mode in the bottom right corner of the controller assignments window.
- Pick a parameter in Logic and move it. This can be anything from a knob in a third-party synth or the volume slider on a track in the mixer.
- Logic will recognize your parameter in the “parameter” field.
- Then move the control on your hardware that you want to correspond to the parameter you just selected.
- BAM! Your hardware is mapped!
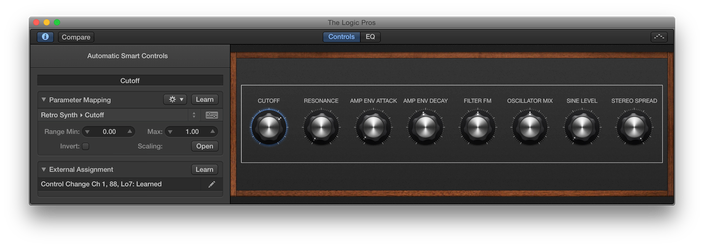
Smart Controls
You can also map parameters within the smart controls of an instrument by clicking the “i” icon in the top left of the smart controls panel.
*The smart controls are their own post- there is so much you can do with them, but this is just one little tip to hopefully get your creative juices flowing!