Warping in Ableton Live: The Basics
Distinctively, audio is defaulted to an elastic state in Ableton Live.
Logic calls it Flex Time ProTools calls it Elastic Audio Ableton calls it WarpingIn basic terms, all of these functions do the same thing. They allow users to automatically or manually adjust the timing of audio without affecting its pitch. Ableton’s warping function has a great reputation among producers and audio editors. So, let’s talk about it!
The Clip View
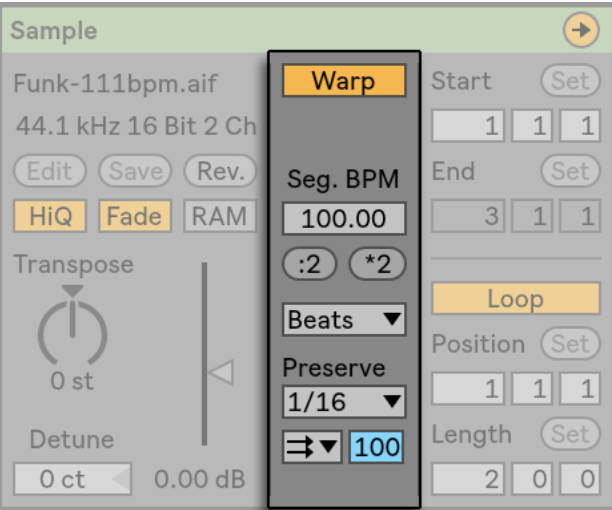
The Warping Controls live within the Clip View and can be found on the bottom left of a screen when a clip is selected. As you can see to the right here, the Warping controls have a big yellow button that says Warp. This toggles the warping function off and on on only the selected clip. Below the Warp button we have a place where you can enter the segment’s original BPM. This will help Ableton in warping your clip.
Warp Modes
Then, we have our warp modes. In this visual it is set to beats, but there are six warp modes:
Beats Mode is great for rhythmic clips with strong, clear transients.
Tones Mode is great for clips with strong, clear pitch distinction such as vocals.
Texture Mode is good for, you guessed it, textural clips.
Re-pitch Mode changes the pitch along with the tempo when the clip is sped up or slowed down.
Complex Mode is great for multitrack mixes and such
Complex Pro Mode is like complex mode, but with more precision and therefore more CPU usage.
Each mode has its own settings that have to do with how Ableton will go about shaping and preserving the clip’s sound. The options below the mode dropdown will change based on the selected mode.
Tell Ableton To Warp
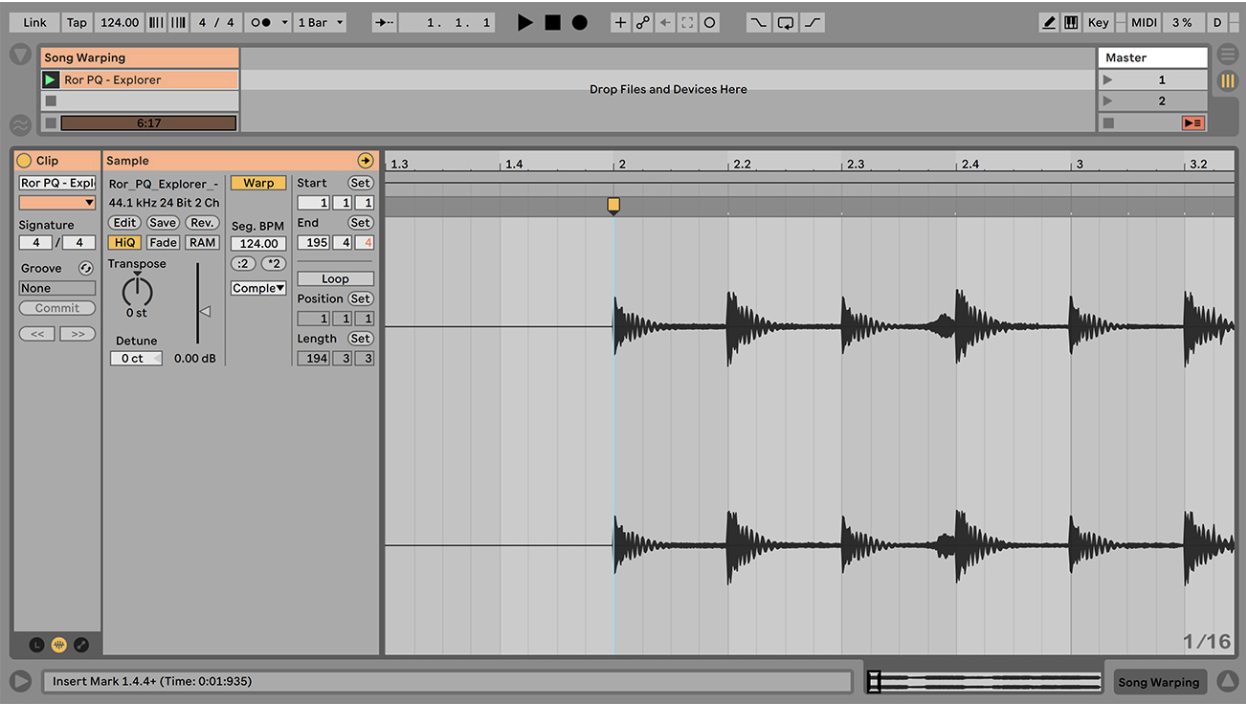
To the right of the box on the left in the clip view, we have the clip’s transients laid out over time in a waveform. This is where we will do our manual warping or tell Ableton to warp for us and adjust from there.
- Add a marker to the first transient of the sample by placing your cursor and double-clicking.
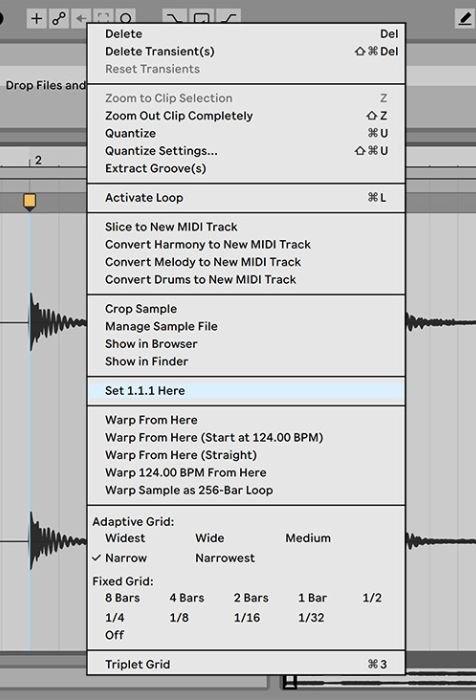
- Now, set this as 1.1.1 by right clicking and selecting “set 1.1.1 here.”
- From here, right click again and select “warp from here (straight). This warping style works best for longer samples with a consistent tempo. Ableton will then create warp markers on transients and snap them to the grid. These markers are adjustable, so adjust away!
If you have a sample with an inconsistent tempo, you most likely will want to warp manually. This means you will add your own warp markers and drag them to your desired place on the grid.
Here are some helpful tips when it comes to manually warping:
- Double clicking a warp marker will pin it to the grid. So, if you correctly warp, say, a measure of audio, add a marker to the beginning and end of the section and double-click them to lock that section of the sample in its position. Now, warping other parts of the sample won’t affect the area between the locked markers.
- Use the right warp mode! If you aren’t using a beat, don’t warp in beat mode. Without granular sampling, some audio might not stretch well. Be sure to remember and look back at the differences between warping modes.
- Check Ableton’s auto warping. We all love to be lazy and let the computer do it for us. However, each sample is different, and Ableton simply can’t always do it all on its own. Be sure to listen carefully back to your sample and pay attention to the placement of warp markers. Ableton might place warp markers on incorrect transients or snap warp markers to the wrong spot. Just double check. Do it.