Improving Your Workflow & Speed in Ableton Live
by Jannick Frampton
Compared to many other DAWs, Ableton Live Suite is often said to be intuitive, quick to learn, and easy to use. Though in general creation with Live is fast and fluid, there are many simple ways to improve your workflow, speed, flow. These tips will help you work faster, and spend more time making music and less time clicking things.
Keyboard Shortcuts
The simplest and most obvious way to speed up your in any program is to use keyboard shortcuts. The time saved simply not going back and forth between the mouse and keyboard as much is quite noticeably significant. Here are some of my most used shortcuts -- not including the obvious ones like CMD- C/V and CMD-S.
| Task | Windows | Mac OS |
| Toggle Session/Arrangement View | Tab | Tab |
| Insert Audio Track | CTRL-T | CMD-T |
| Insert MIDI Track | CTRL-Shift-T | CMD-Shift-T |
| Insert Return Track | CTRL-ALT-T | CMD-ALT-T |
| Rename Selected Track | CTRL-R | CMD-R |
| Group/Ungroup Tracks | CTRL-G / CTRL-Shift-G | CMD-G / CMD-Shift-G |
| Solo Selected Tracks | S | S |
| Open the Preferences | CTRL-, | CMD-, |
| Search in Browser | CTRL-F | CMD-F |
| Duplicate | CTRL-D | CMD-D |
| Duplicate Time Selection | CTRL-Shift-D | CMD-Shift-D |
| Deactivate Selected Clip/Selection | 0 | 0 |
| Insert MIDI clip | CTRL-Shift-M | CMD-Shift-M |
| Split Clip at Selection | CTRL-E | CMD-E |
| Consolidate Selection into Clip | CTRL-J | CMD-J |
| Toggle Loop Selection | CTRL-L | CMD-L |
| Toggle Automation Mode | A | A |
| Reverse Audio Clip Selection | R | R |
| Quantize | CTRL-U | CMD-U |
Though there are many more shortcuts, these are the ones I use in most sessions. For a complete list of shortcuts, see https://www.ableton.com/en/manual/live-keyboard-shortcuts/. I’ve found that referencing a list of shortcuts as I work is the best way to incorporate them into my workflow.
Custom Key/MIDI commands
Another powerful feature in Ableton Live is the ability to map functions to your own custom key command, or a MIDI message that can be controlled by a knob, fader, or button on an external MIDI controller. To access this, click either the “Key” or “MIDI” buttons in the top left corner of the screen.

Then, click any parameter illuminated by color, and once it is selected, click your key/button of choice on your keyboard or controller. To lock it into place, just click the Key/MIDI button again and click your key/button to give it a test.

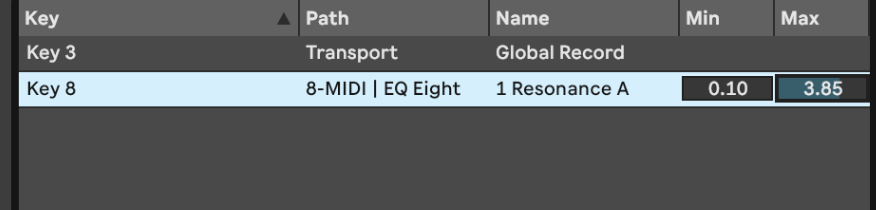
Here, I have mapped my record button to the “3” key on my keyboard. This is one of the most useful custom keys I have mapped; it really speeds up the process of recording.
If the parameter you choose to map is continuous, you can set minimum and maximum values. This really only works with continuous controllers such as faders, knobs, or wheels, but though I’ve mapped it to a key you can still see the control in the photo below.
I implore you to come up with more custom key functions that help speed up your process.
Make a Template!
Making a default template is a no brainer when it comes to quickening up your process. Not only does this help you get right into music-making, but it can help you define your own personal sound. To get started with your template, create a new set, and add whatever tracks and devices you like to start your sessions with. Here is a screenshot of my default set:
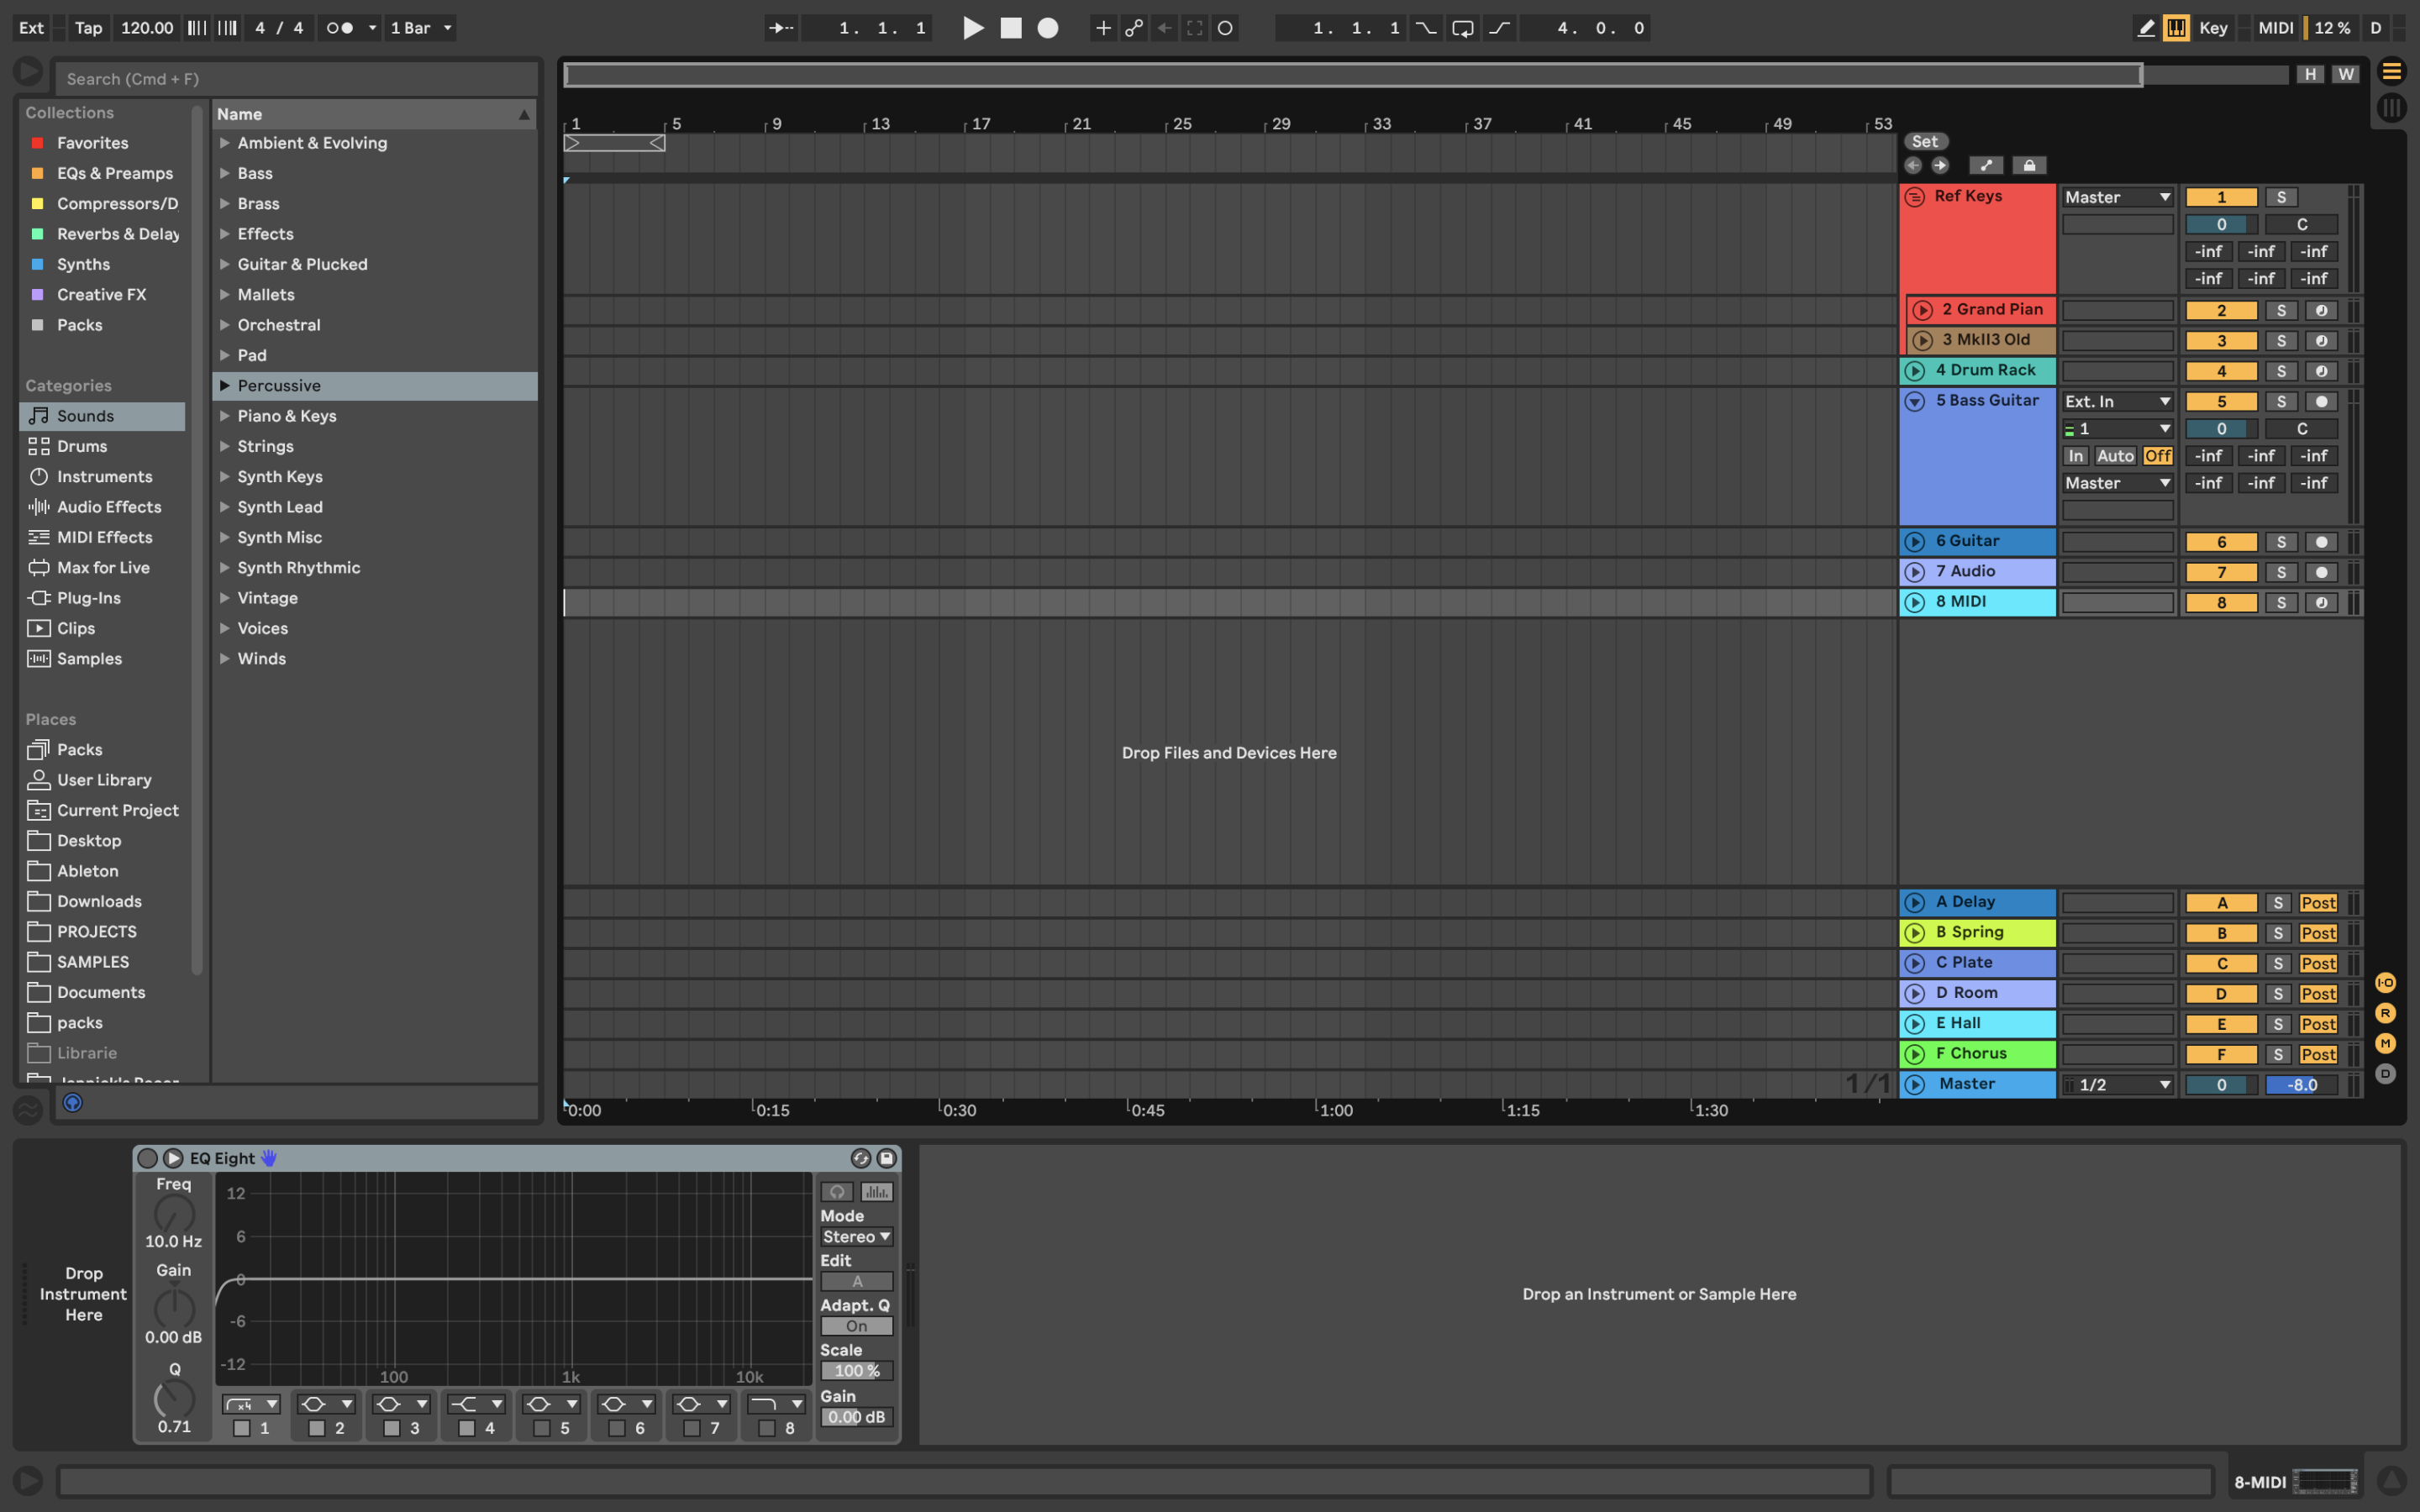
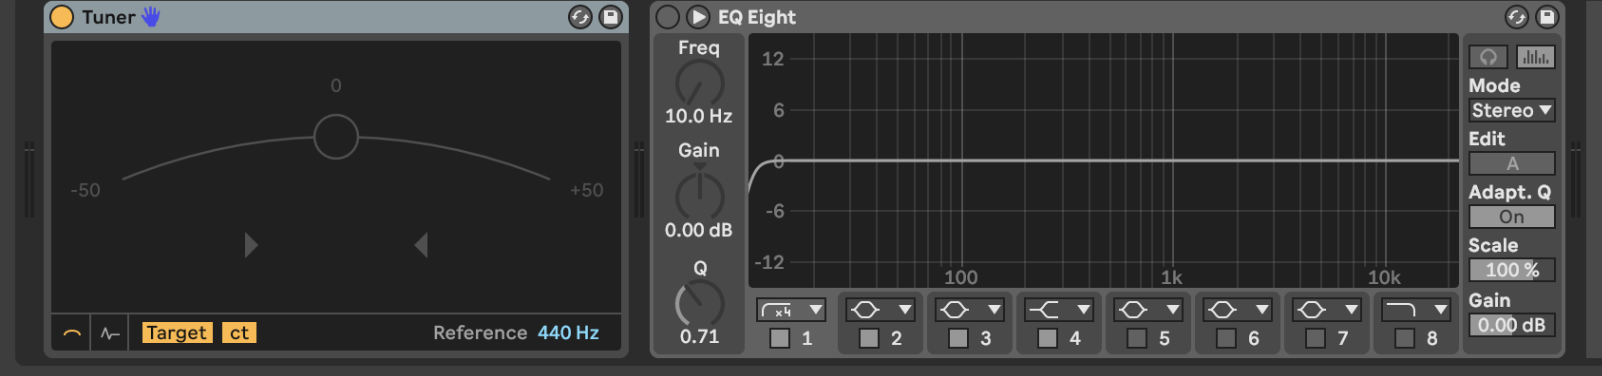
I started with two grouped MIDI tracks preloaded with keys sounds, a Piano and Rhodes respectively. Sometimes I need a simple and clean sound to reference chords and melodies with, so I find that useful. Because I’m generally always using the same interface with mics and instruments going to dedicated inputs, I saved two tracks for my instruments, with tuner devices loaded up so I can get tuned before I do a take.
Other than that, I have a Drum Rack instrument on a MIDI track so I can quickly load in drum samples and program a groove, and under that, simply, a blank audio and a blank MIDI track.
I also have 6 Return tracks with some of my favorite reverbs and delays. By choosing to place these in my default set, I end up naturally using these sounds which I like in my productions more. This can help create a certain identity or cohesion to your music. You should be careful to find a balance between convenience and clutter, as too much loaded into your default set could slow down your computer, or worse, get in the way of your process.
Favorites
If you are a color oriented person, you’ll be drawn to Live’s Favorites feature, Like in Mac OS, you can set color tags to anything that can be found in the browser (plugins, devices, samples, etc). The best part about this is that you can rename and organize your color tags to your liking, and you can also assign multiple colors to the same item. Take a look at my organizational choices:
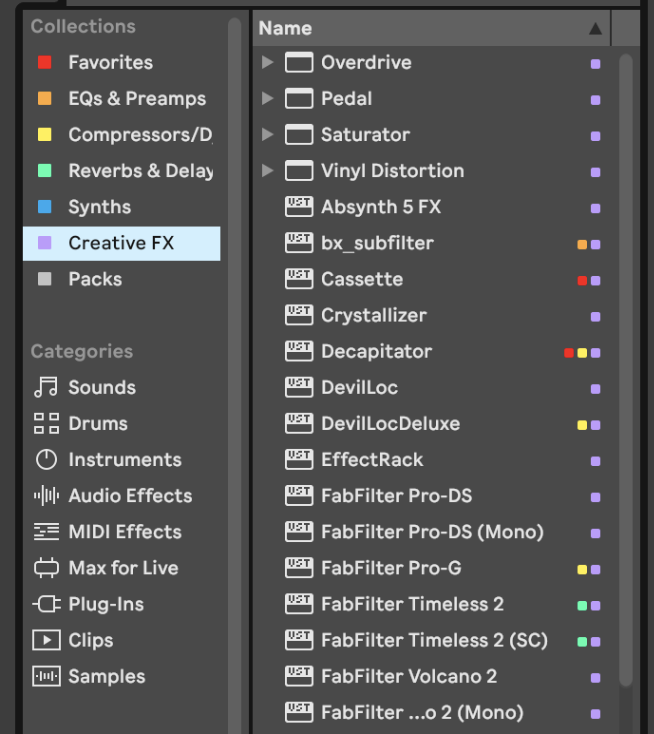
Because I have way too many plugins, I find that using the colors to help organize them into categories is really helpful. Some people may choose instead to use the colors to organize their sample libraries.
Defaults
Another great feature in Live is the ability to set defaults for tracks, plugins, instruments, and effects. If you find yourself reaching for the same tools each time you load up tracks or effects, this is an excellent tool to take advantage of.
Nowadays, I end up using some sort of EQ on almost every track. Once I discovered defaults, I immediately decided to save a bypassed (off) EQ8 device on every audio and midi track automatically. To do this, I simply loaded up an audio and midi track respectively, and set them up exactly how I wanted them to appear when I add a new track. I tend to prefer to do volume automation using the utility device, so I added a bypassed, collapsed Utility device as well. Then, I right-clicked on the track and selected “Save as Default Audio Track”. Now, when I hit CMD-T, I get a track with my custom ‘channel strip’.
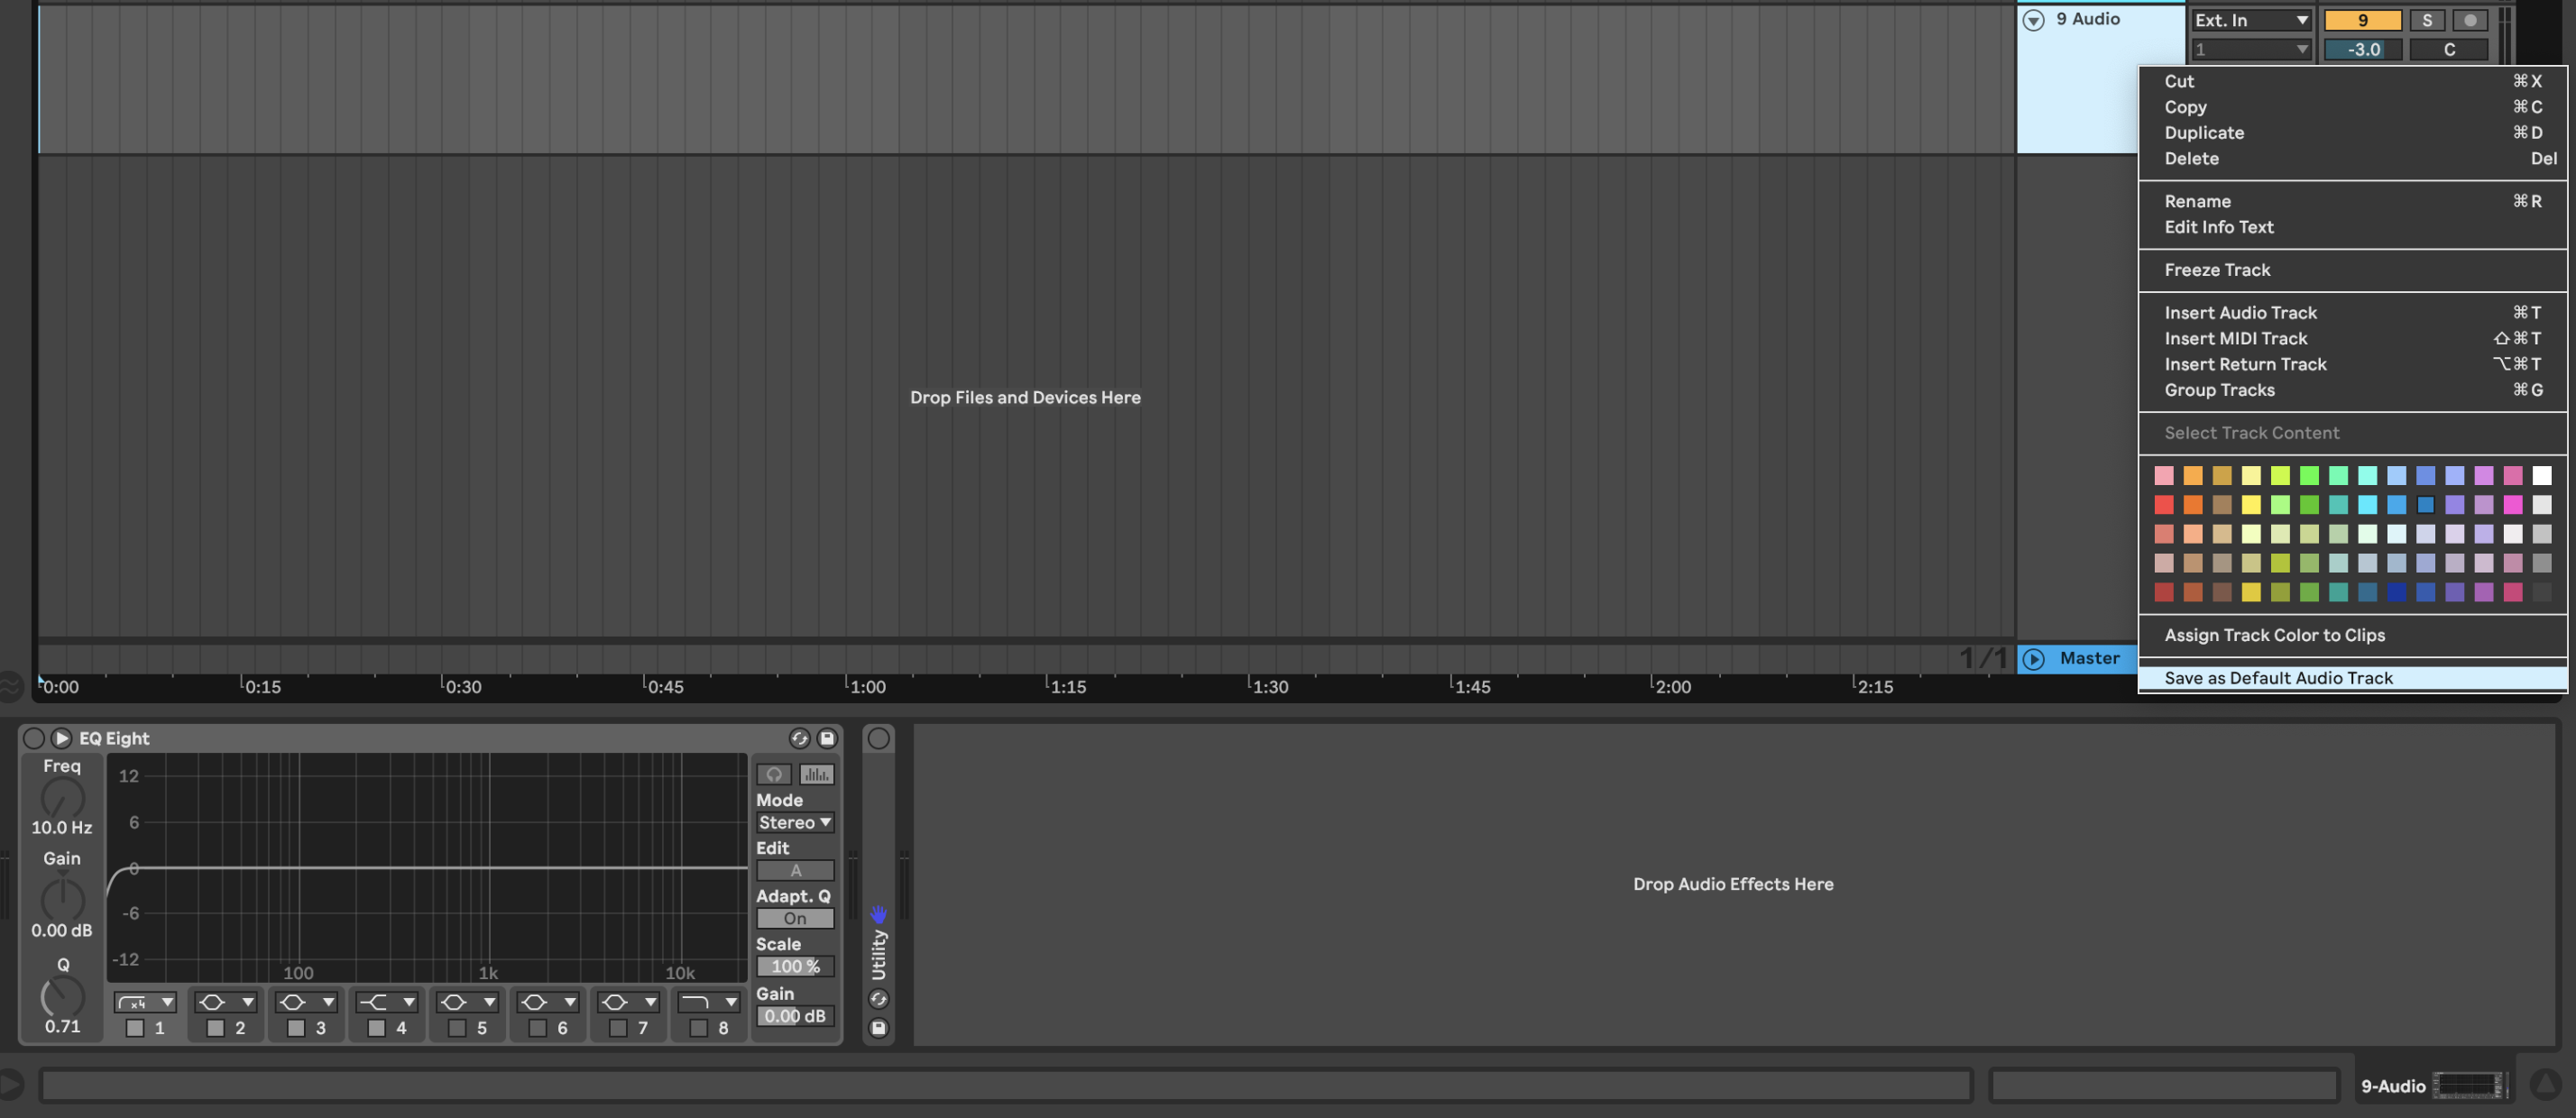
You may have noticed that my EQ 8 looks a little different too -- this is because I made a custom EQ 8 default preset, with filter 1 set to a High Pass filter by default. Because I cut lows from pretty much everything that’s not Kick or Bass, this is very handy. The process of setting these default presets on devices is the same -- just set the device to the state you would like it to load up in, right-click, and select “Save as Default ___”. This works for all effects, tracks, and instruments.
3rd Party Tools: Live Enhancement Suite
I recently stumbled upon a 3rd party tool called Live Enhancement Suite. Built entirely with workflow in mind, LES adds even more features and functionality to Live, such as the ability to create a customizable quick-access menu, and even more ‘macro’ keyboard shortcuts. Once you have taken into consideration simple tips in this guide, I would definitely suggest checking it out here: https://enhancementsuite.me/
RTF(reakin’)M
If you want to maximize your efficiency and your overall Live experience, the best and most straightforward thing to do would be to simply check out the manual. Though it is packed with information, the language is accessible while remaining detailed and clear. To gain a deeper understanding of Live’s powerful functions and tools, I really recommend reading the manual, which you can access here: https://www.ableton.com/en/manual/welcome-to-live/ No matter your skill level, there is without a doubt something new to be learned.