Beat Detective Quantization
By Kari Estes
Quantizing audio through the use of elastic audio seems to be the most popular method. While this is a great method of tightening up songs, I have always been left dissatisfied with elastic audio. I find this method to be very touchy, and often leaves behind artifacts or a seemingly half-finished job. Personally, I find quantization using beat detective to be a better alternative.
This guide will walk you through the basics on how to use beat detective for this purpose. This method only works if you are locking your audio to a grid - so it’s recommended that you have recorded to a click.
Step 1. Understanding the Menu
To pull up the Beat Detective menu, go to Events>Beat Detective or press ⌘+numpad8. This will bring up the following window:
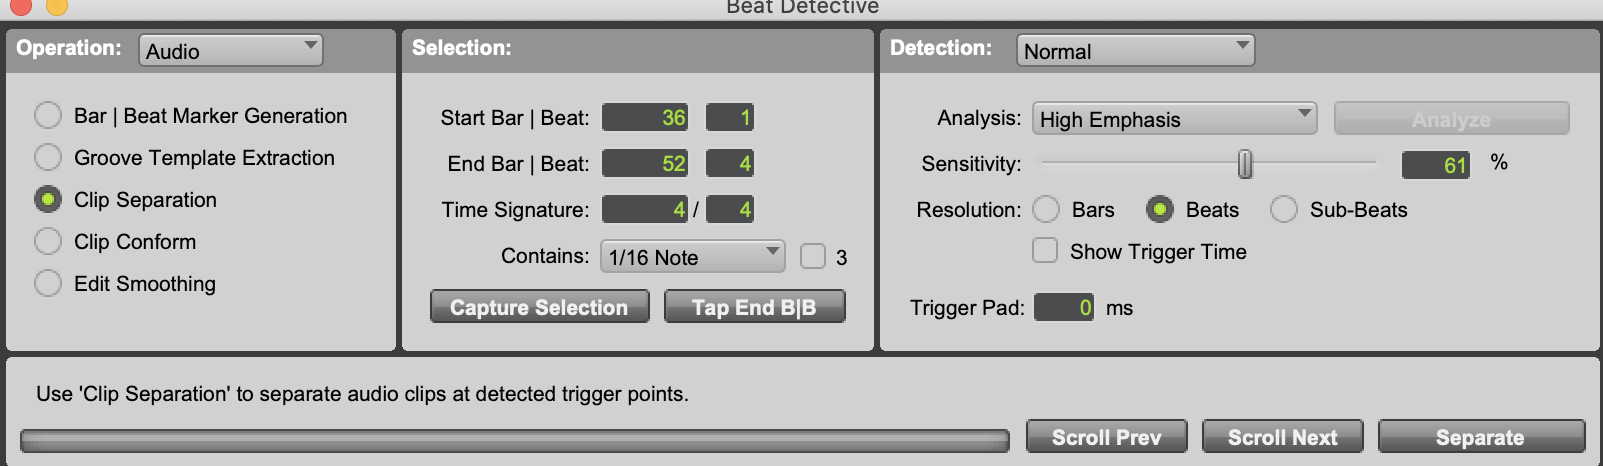
The operations we will focus on for the purpose of this guide are the last 3 - Clip Separation, Clip Conform, and Edit Smoothing. These options are pretty self explanatory - they separate, conform and smooth respectively.
The have a common middle section, under “Selection”, where you can capture the bar or section where the clip will be conformed. You can manually input the start/end bars and beats or select the clip and press the “Capture Selection button. There is also an option to add subdivision, which will help with the analysis of the audio. Each different operation has a unique third menu, which we will look closer at in a breakdown of each function.
Step 2. Clip Separation
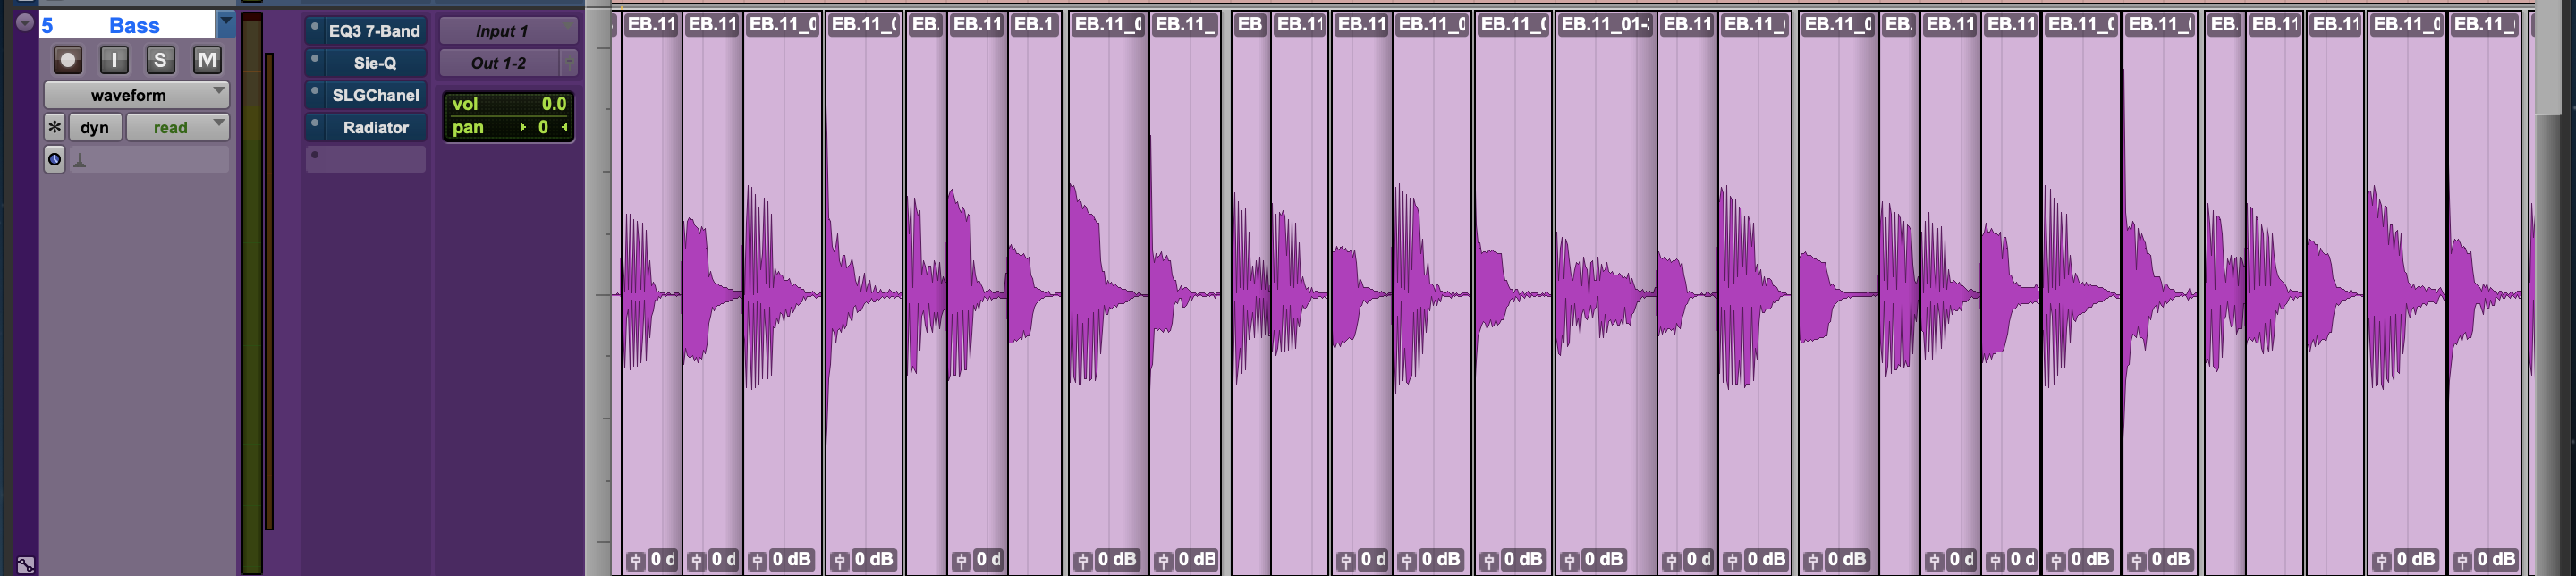
To start this process, “Clip Separation” will be used. This process will analyze the clip and separate it where the transient hits, cutting the larger clip into smaller ones that will later be moved onto the grid.
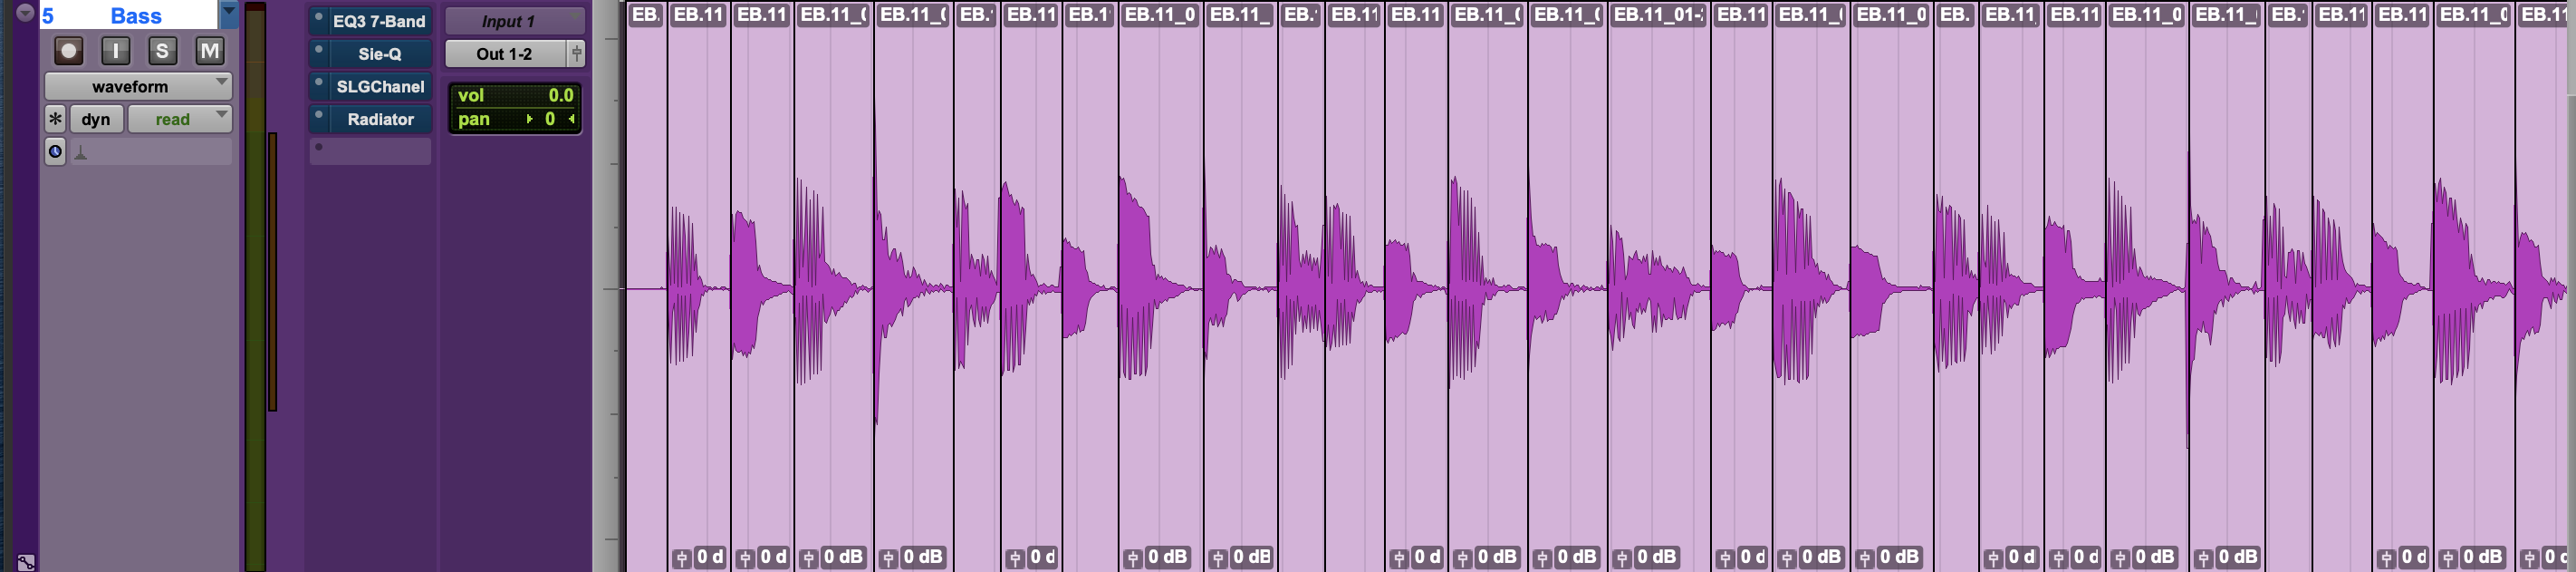
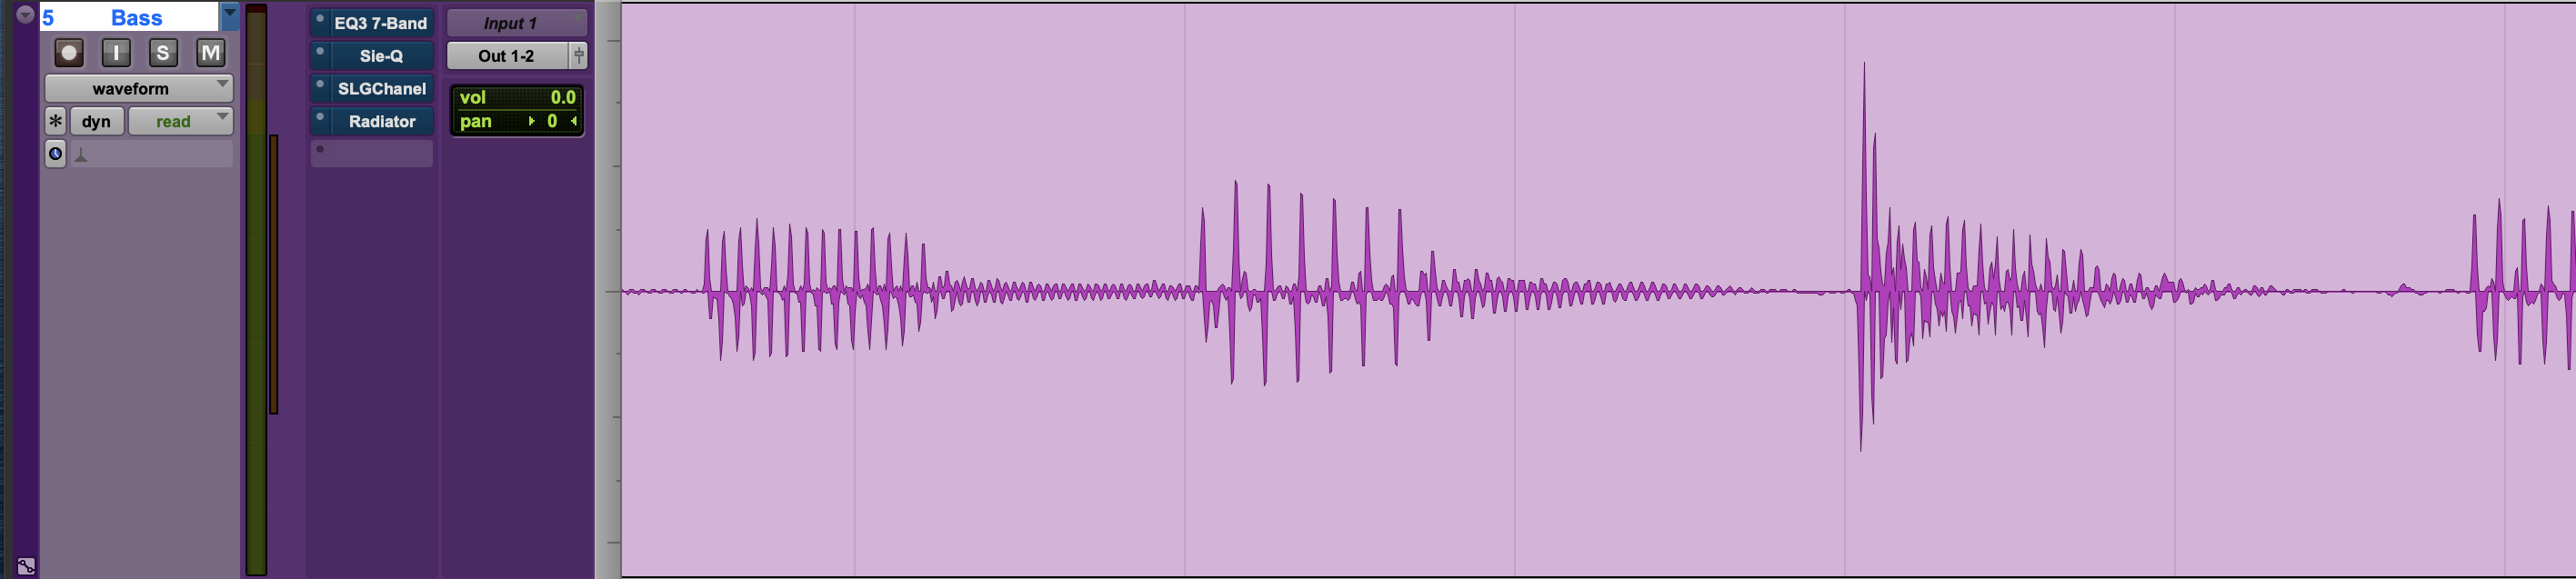
I’ve taken a bass line zoomed very far into the waveform. As you can see, the line is fairly in time but is just ever so slightly behind the beat. We’re going to fix this.

In the Beat Detective menu, select Clip Separation. Press the “Capture Selection” to make sure you’re working in the right section. And lastly, go analyze the audio. With this process, there are a few options:
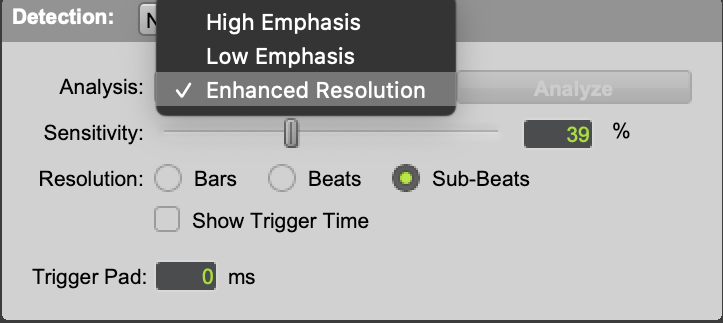
The different resolutions correspond to the type of instrument you are quantizing. High-Emphasis works best for instruments with short, powerful transients such as snares, hi-hats or various percussions. Low-Emphasis works for lower-pitched instruments, like toms, bass drum, or electric bass. Enhanced Resolution is an algorithmic based analysis and is very versatile.
The sensitivity slider will help with the amount of transient analysis, just like with elastic audio.
Resolution will help us “humanize” the quantization by allowing us to choose the subdivision we want. The smaller the division (i.e, Sub-Beats), the more the audio will be effected.
Trigger Pad will put the specified amount of time before the cut of the audio.
If needed, you can add a new trigger by clicking on the clip. Deleting a trigger can be achieved by holding ⌥ and clicking the desired trigger.
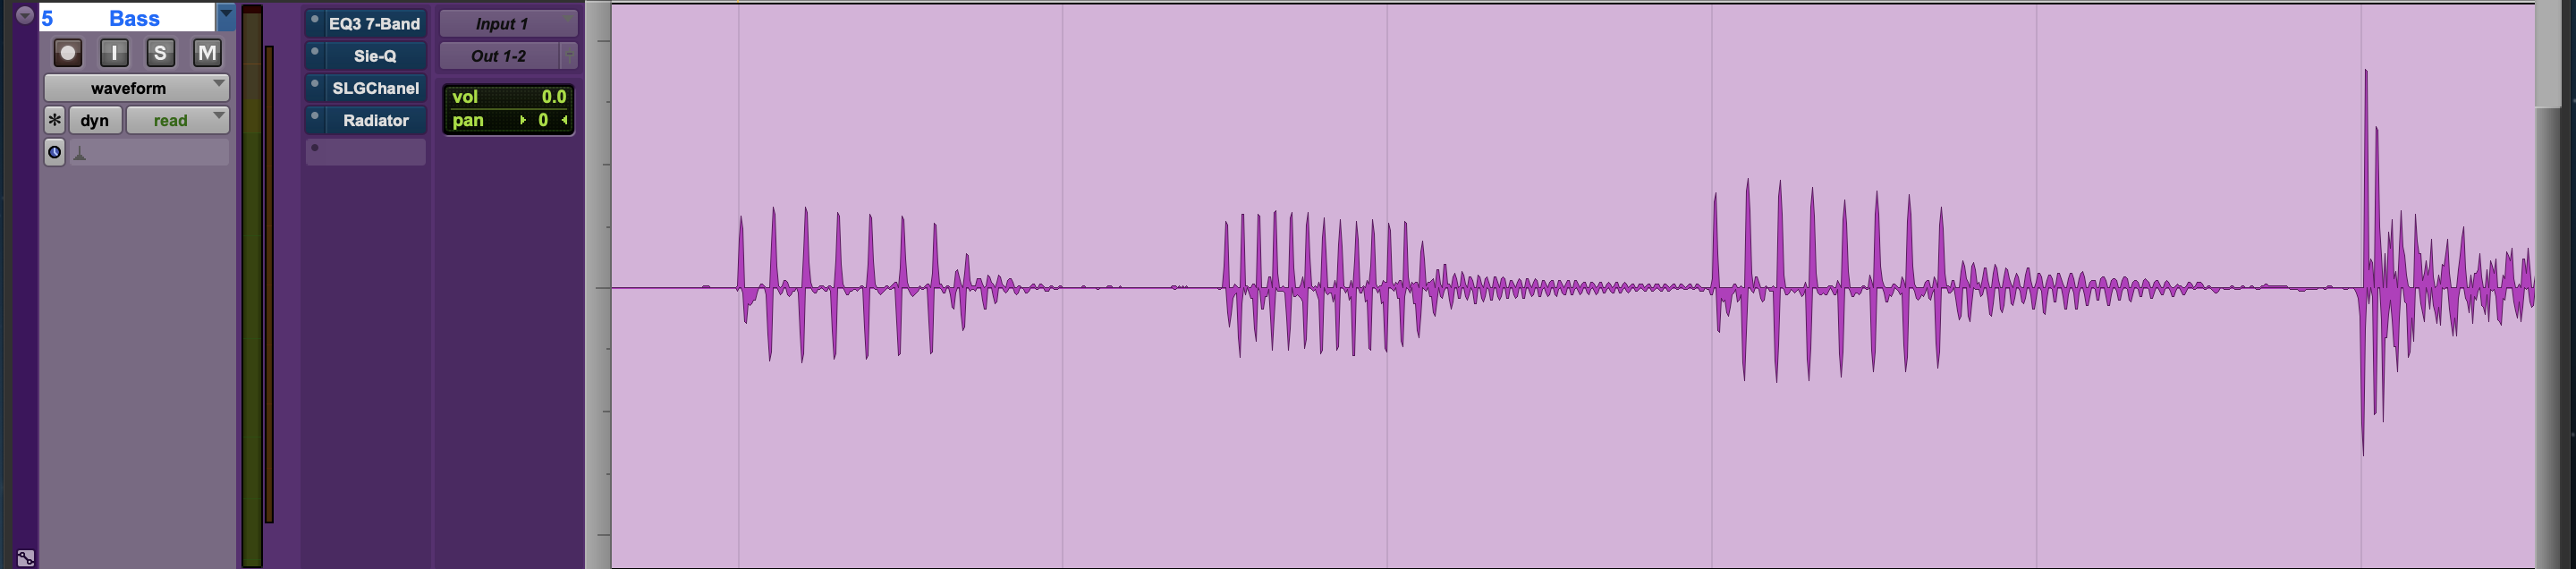
Once you have all the parameters set, click the “Separate button” at the bottom right of the menu. The clip should cut at every trigger point and looks something like this:
Step 3. Clip Conforming
The next step is going to be using the “Clip Conform” menu as shown:
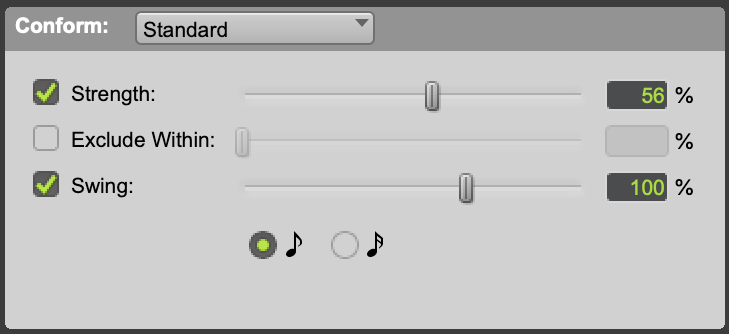
There are 3 sliders to define here.
“Strength” refers to, for lack of a better term, how strong the quantization will be. That is, it corresponds to how close to the grid the clips will be placed.
“Exclude Within” sets up a dead zone for the quantized audio. It’s basically saying that if the audio is within the set distance (in percentage) away from the beat, it will not be moved. This setting really helps humanize the quantization of your audio track.
“Swing” Allows you to set a level of swing to the quantization, and even has options to define the swing subdivision.
Highlight all the clips you had previously chopped up, and press that “Capture Selection” button in the center section again (this is to just make sure we’re still working with the right measures, better safe than sorry!)
Change the sliders to the desired strengths. Remember:
The higher the “Strength”, the more conformed the audio will be.
The higher the “Exclude Within”, the more human the audio will sound
Once everything is set, click “Conform” and the audio should be quantized. It will look something like this:
Step 4. Edit Smoothing
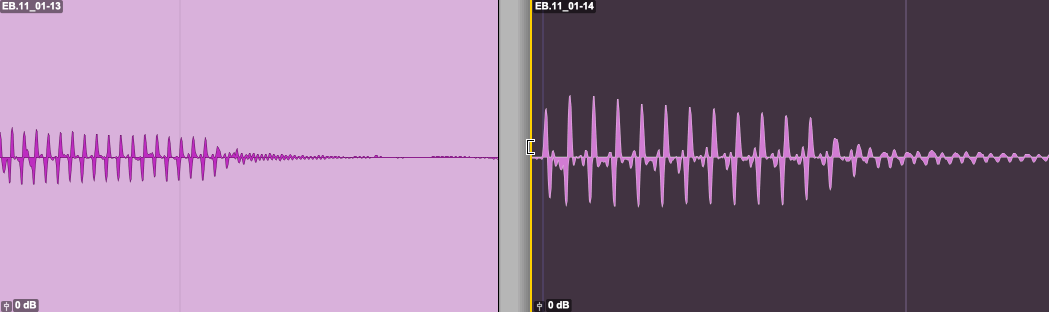
As you may have noticed, after conforming the audio our track has some gaps in it. The last step will fix these gaps.
The concept of smoothing is that it takes the cut up clips and extends the beginnings of to touch the previous clip. So, smoothing is basically streamlining this process:
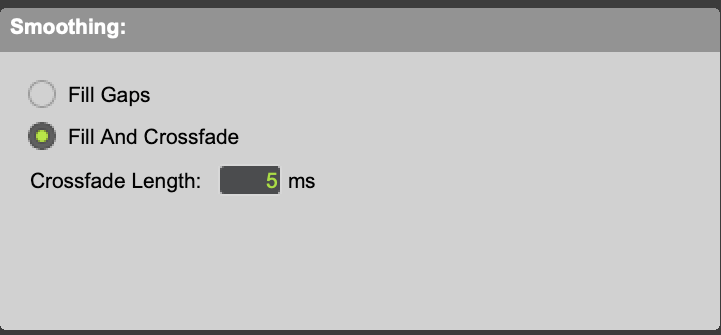
There are two ways we can smooth audio. The first is to just “Fill Gaps”. This will take each clip and do the process above.
The second option is to “Fill and Crossfade”. This will fill the gaps between each clip and add a crossfade, specified by the amount of time input in the box. I suggest using this option, due to it eliminating the possibility of any pops or clicks caused by smoothing gaps. Shorter crossfades are preferred, for it will also eliminate the attack of the note accidentally happening twice, or weird skips in your audio from occurring.
Once you have “Smoothed” the audio, it should look something like this:
All of our gaps are gone, and the audio has been quantized to the grid.
Step 5. Listen!
At this point, we’ve gone through all the steps of recording. It is crucial that you listen to the audio you have just changed. If you hear anything weird, this would be the time to go back and fix it.
Once you are satisfied with everything, you can either leave the audio track with all the tiny clips or, to reduce CPU usage and to clean the edit window a bit, highlight all the small clips and press ⇧+⌥+3 to render a new audio clip.
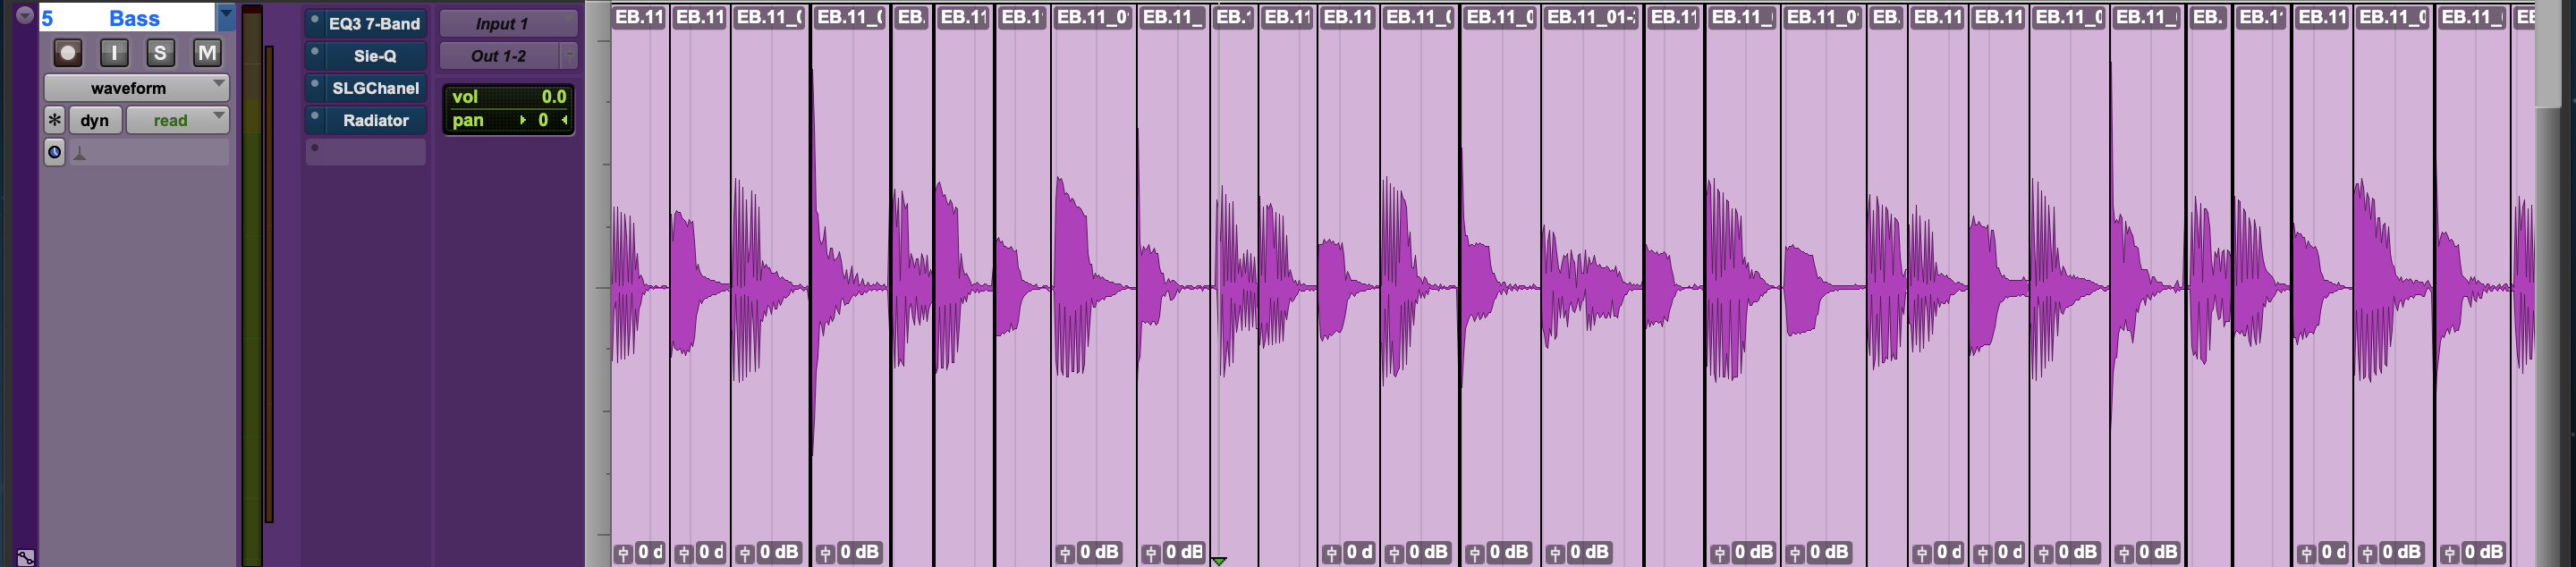
As a fun comparison, let’s look at where we started and where we ended up:
Sign-up for a Peer Training today if you’d like to learn more about these and other topics at library.berklee.edu/training